Exercise 1 - Modeling a basic process
Goal
The goal of this exercise is to create a first basic version of the leave request process diagram.
At this stage the process is executable but has very limited value from the business point of view as it does not yet contain forms or data. We will extend it in the upcoming exercises.
Note that validation of diagrams in Bonita Studio needs to be triggered manually. If you just fix an error or a warning you might want to go to Validation status tab and click on the Refresh button or go to Studio menu File and click on Validate.
Instructions overview
In order to complete the exercise, create a LeaveRequestDiagram diagram in version 1.0.0 containing a LeaveRequest process in version 1.0.0.
The process pool should contain the following BPMN elements:
- A start event named Fill request
- A human task named Validate request
- An exclusive gateway named Is Approved?
- A service task named Notify request approved
- A condition always
true(for testing purpose) on the transition connecting the gateway to the notification approval task - A service task named Notify request rejected
- A default transition connecting the gateway to the reject task
- An end event named End - Request rejected
- An end event named End - Request approved
Step by step instructions
- Start the Bonita Studio
- On the Studio home page, click on New Project in the Design menu.
- Enter the project name LeaveRequest and click on Create
Note : Vous avez la possibilité de choisir dès la création du projet les extensions à intégrer. Cela peut être utile dans le cas d'un projet réel, mais dans notre exemple nous aborderons les extensions plus tard.
-
Create a new process diagram
- From the project overview, click on Create in the Process diagram section
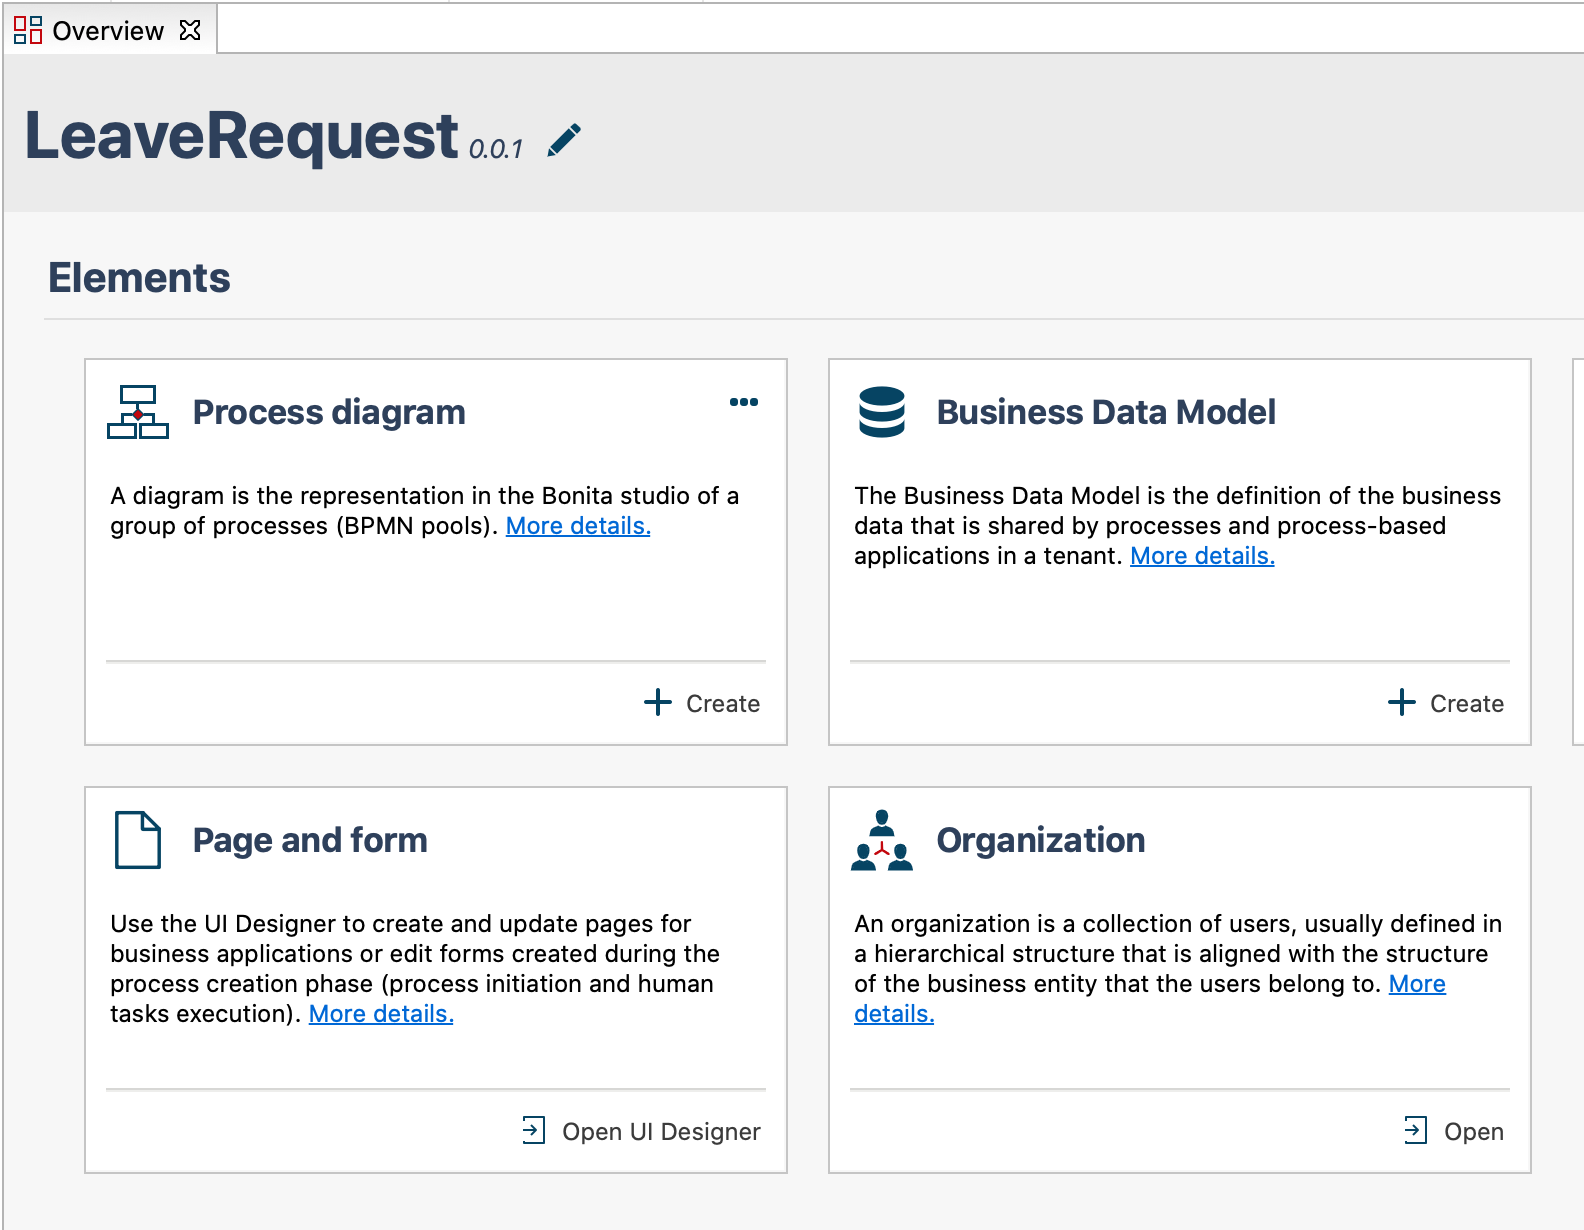
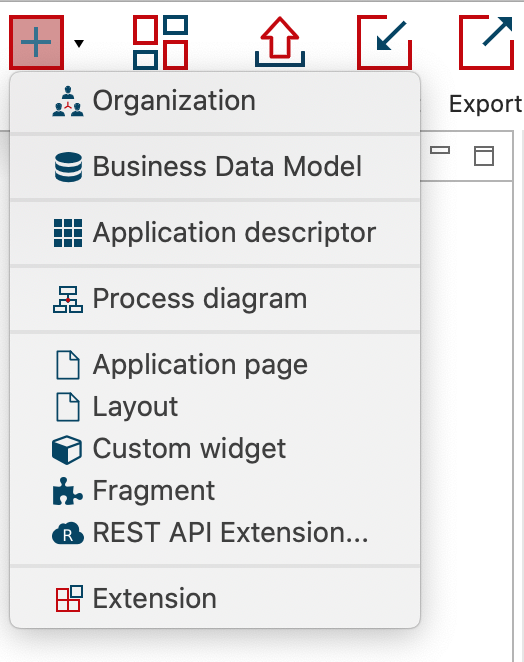
- or from the menu
- From the project overview, click on Create in the Process diagram section
-
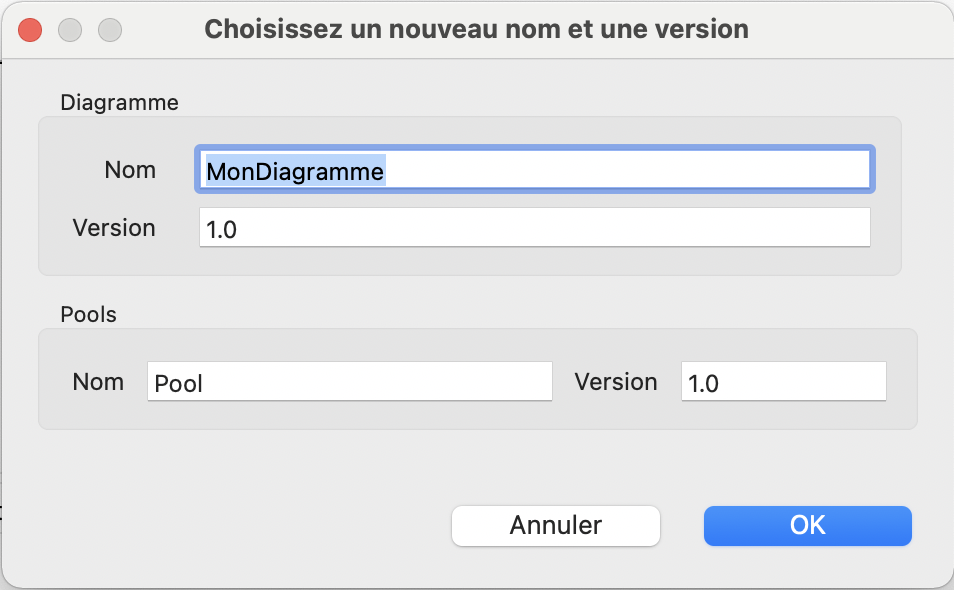
Set the diagram and process names:
- Right click on the diagram name MyDiagram-1.0.proc in the explorer, Rename
- Enter LeaveRequestDiagram as the diagram name, LeaveRequest as the pool name and set the version to 1.0.0 for both
-
Rename the start event into Fill request:
- Select the start event from the diagram
- Navigate to the General / General tab and enter the new name
-
Rename the human task into Validate request
-
Add an exclusive gateway named Is approved? next to the human task Validate request:
- Select the Validate request task, perform a drag and drop from the gateway contextual icon
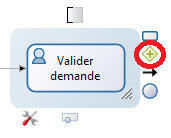
- Once you have created the gateway, use the context tool icon (1) to change its type to Exclusive (2)
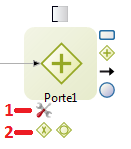
- Rename the gateway into Is approved?
- Select the Validate request task, perform a drag and drop from the gateway contextual icon
-
Create a service task named Notify request approved after the gateway:
- Select the gateway, perform drag and drop from the contextual event icon (A)
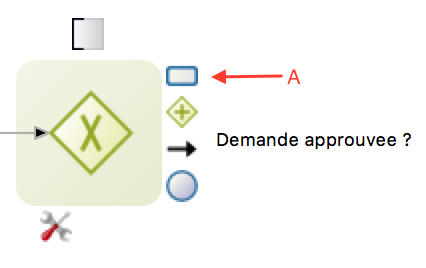
- Once the service task is created, rename it
- Select the gateway, perform drag and drop from the contextual event icon (A)
-
Create a service task named Notify request rejected after the gateway
-
Add an end event named End - Request approved next to the newly added service task Notify request approved:
- Select the task Notify request approved
- Perform drag and drop from the contextual event icon (A) and select the end event (B)
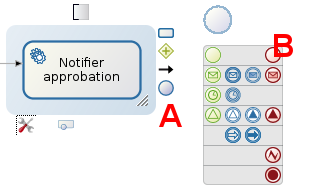
- Once the event is created, rename it
-
Add an end event named End - Request rejected next to the service task Notify request rejected
-
Name the two transitions going out of the gateway:
- Select the transition
- Navigate to the General / General tab and enter the name
- The transition leading to the Notify request approved task should be named Yes and the other No
-
Configure condition on the Yes transition so the flow always goes this path:
- Select the transition
- Type
truein the condition field (General / General tab). If you don't see the Condition field it is probably because you defined a parallel gateway instead of an exclusive one

-
Set the No transition as the default flow:
- Select the No transition
- Check the Default flow property
-
Validate the diagram:
- Navigate to the Validation status tab
- Click on Refresh
- You may safely ignore the 3 warnings related to the UI Designer
-
Make sure that your diagram matches this:

-
Save the process:
- Click on the Save button from the Studio's top menu bar
-
Run the process to test it:
- Select the process pool (the rectangle shape that includes tasks and events)
- Click on the
 button of the Studio's top menu bar (if button is disabled make sure the process pool is actually selected)
 - Your browser should open and display an automatically generated case start form
- Submit the form
- You should be redirected to the task inbox of the Bonita user application
- Select the Validate request task
- Click on the Take button
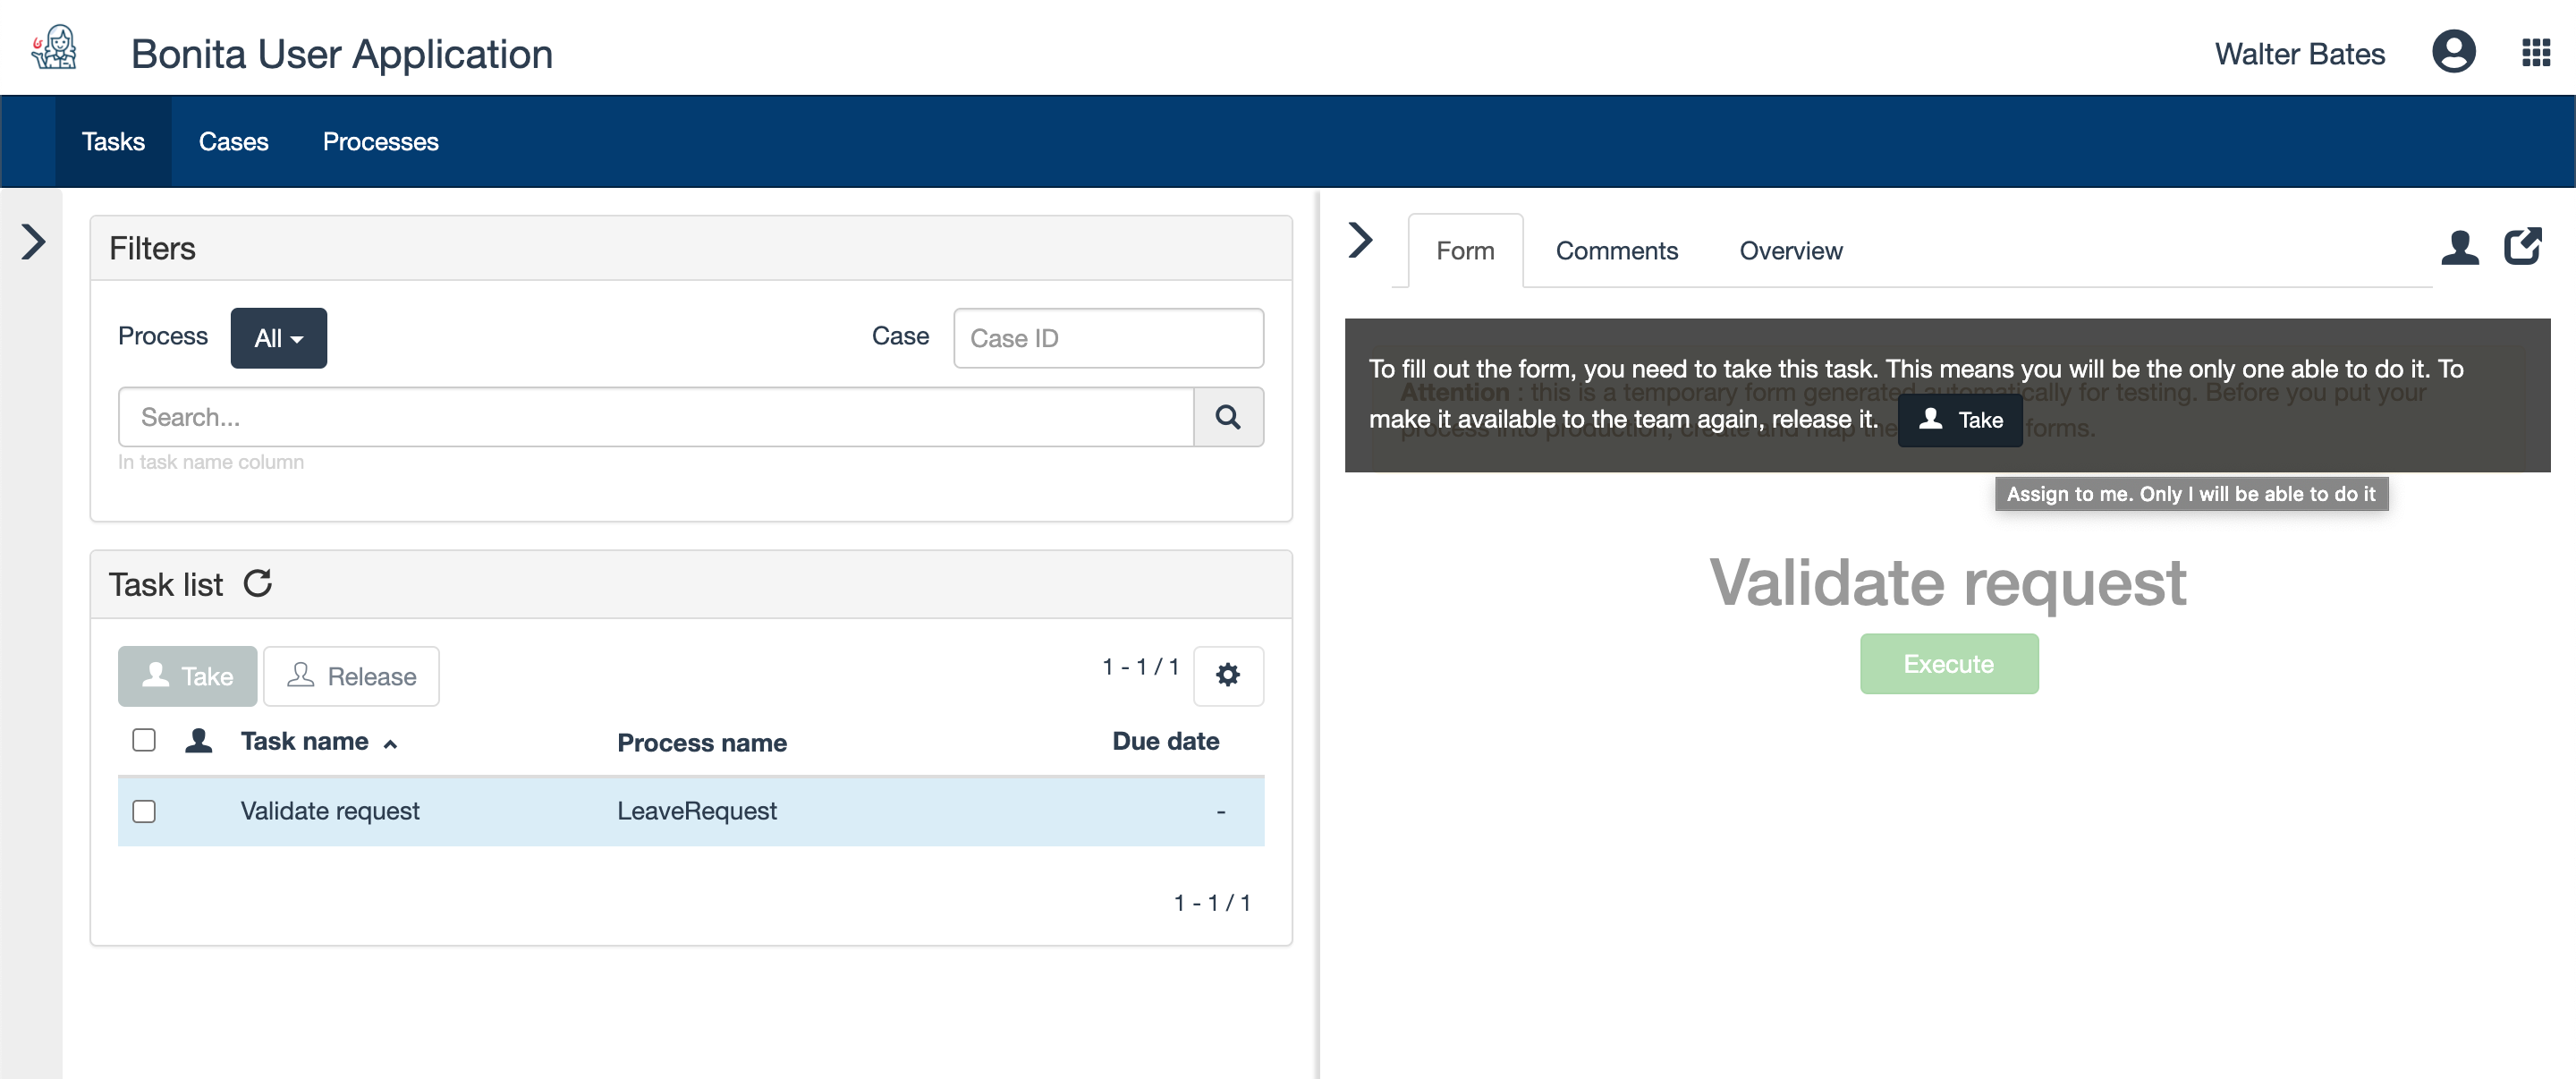
- Submit the form of the Validate request task by clicking on the Execute button to complete your case