Exercise 6 - Build a leave request application
Goal
The goal of this exercise is to enrich the application for users to create and manage their leave requests by adding a fragment.
Instructions overview
Open the UI Designer and go to the Application page named LeaveRequestStatus.
This page already contains a "multiple container" that list the on-going leave requests. We are going to configure this container to enrich it. For each request a clear status will be displayed.
Create a fragment containing a date widget and an input widget to collect new leave request information in the page. Use this fragment in the page and bind its data. Then add a submit button to start a new leave request.
Redeploy the application page using the Deploy button from the application descriptor in Bonita Studio.
Access the application using the generated URL.
Step by step instructions
-
Go to the page LeaveRequestStatus:
- In the Studio, click on the UI Designer button
- Select LeaveRequestStatus page in the Pages tab
- You should now be on the designer page
-
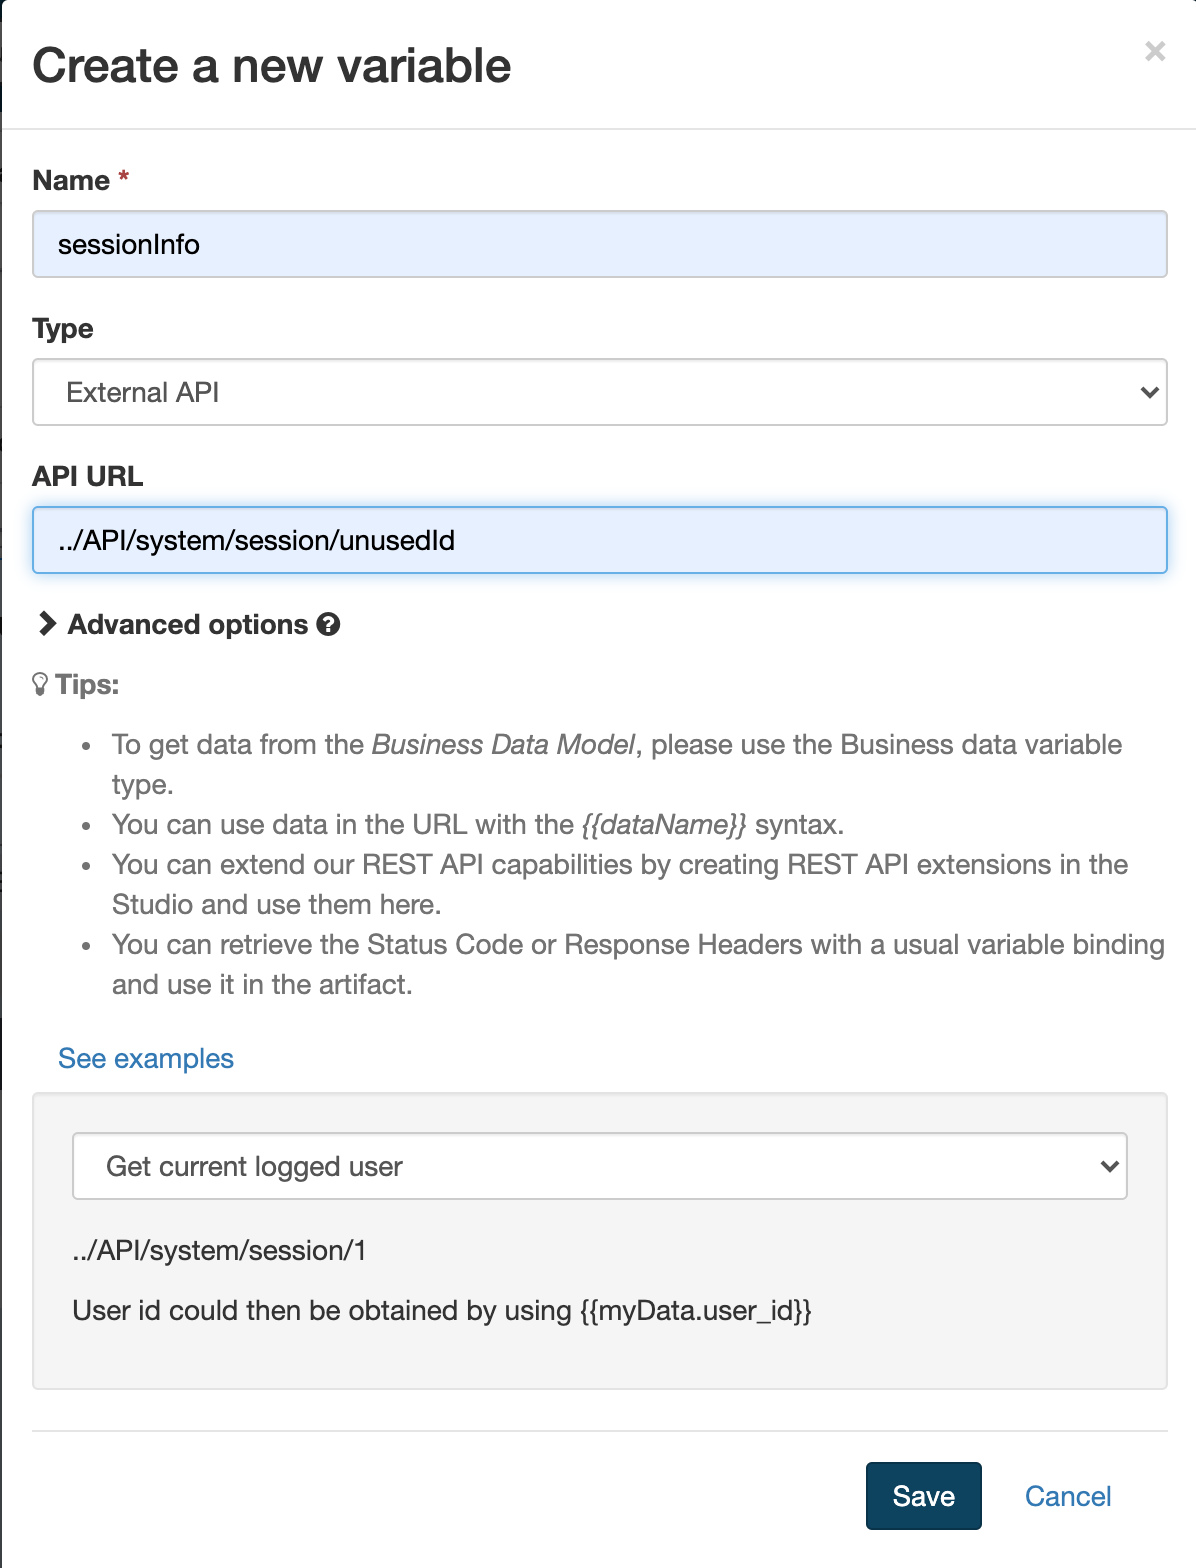
Create a variable to store the session information:
- Click on Create a new variable
- Name it sessionInfo
- Choose External API for the type
- In the field API URL, enter:
../API/system/session/unusedId
-
Modify the label Is Approved of the widget Table:
- Select the widget Table
- In the right panel, in the Headers field, delete RequestorId.
- Replace Is Approved with Status.
-
Declare a new JavaScript expression to format the column Status of the list:
- Click on Create a new variable
- Name it updateLeaveRequestStatus
- Choose JavaScript expression type
- Replace the existing value with the following script:
if($data.hasOwnProperty('leaveRequest') && $data.leaveRequest) { for (let line of $data.leaveRequest) { if (line.isApproved === null) { line.isApprovedLabel = "In progress"; } else if (line.isApproved) { line.isApprovedLabel = "Approved"; } else { line.isApprovedLabel = "Rejected"; } } } return $data.leaveRequest; -
Display the information in the columns of the table more clearly :
- In the right panel, in the field Column keys replace isApproved with isApprovedLabel.
-
Select the Date picker widget called Leave Start and edit the following properties:
Property Value Read-Only Yes Label Start date Show Today button No -
Select the Input widget called Day Count and edit the following properties:
Property Value Read-Only Yes Label Number of days - Save the page
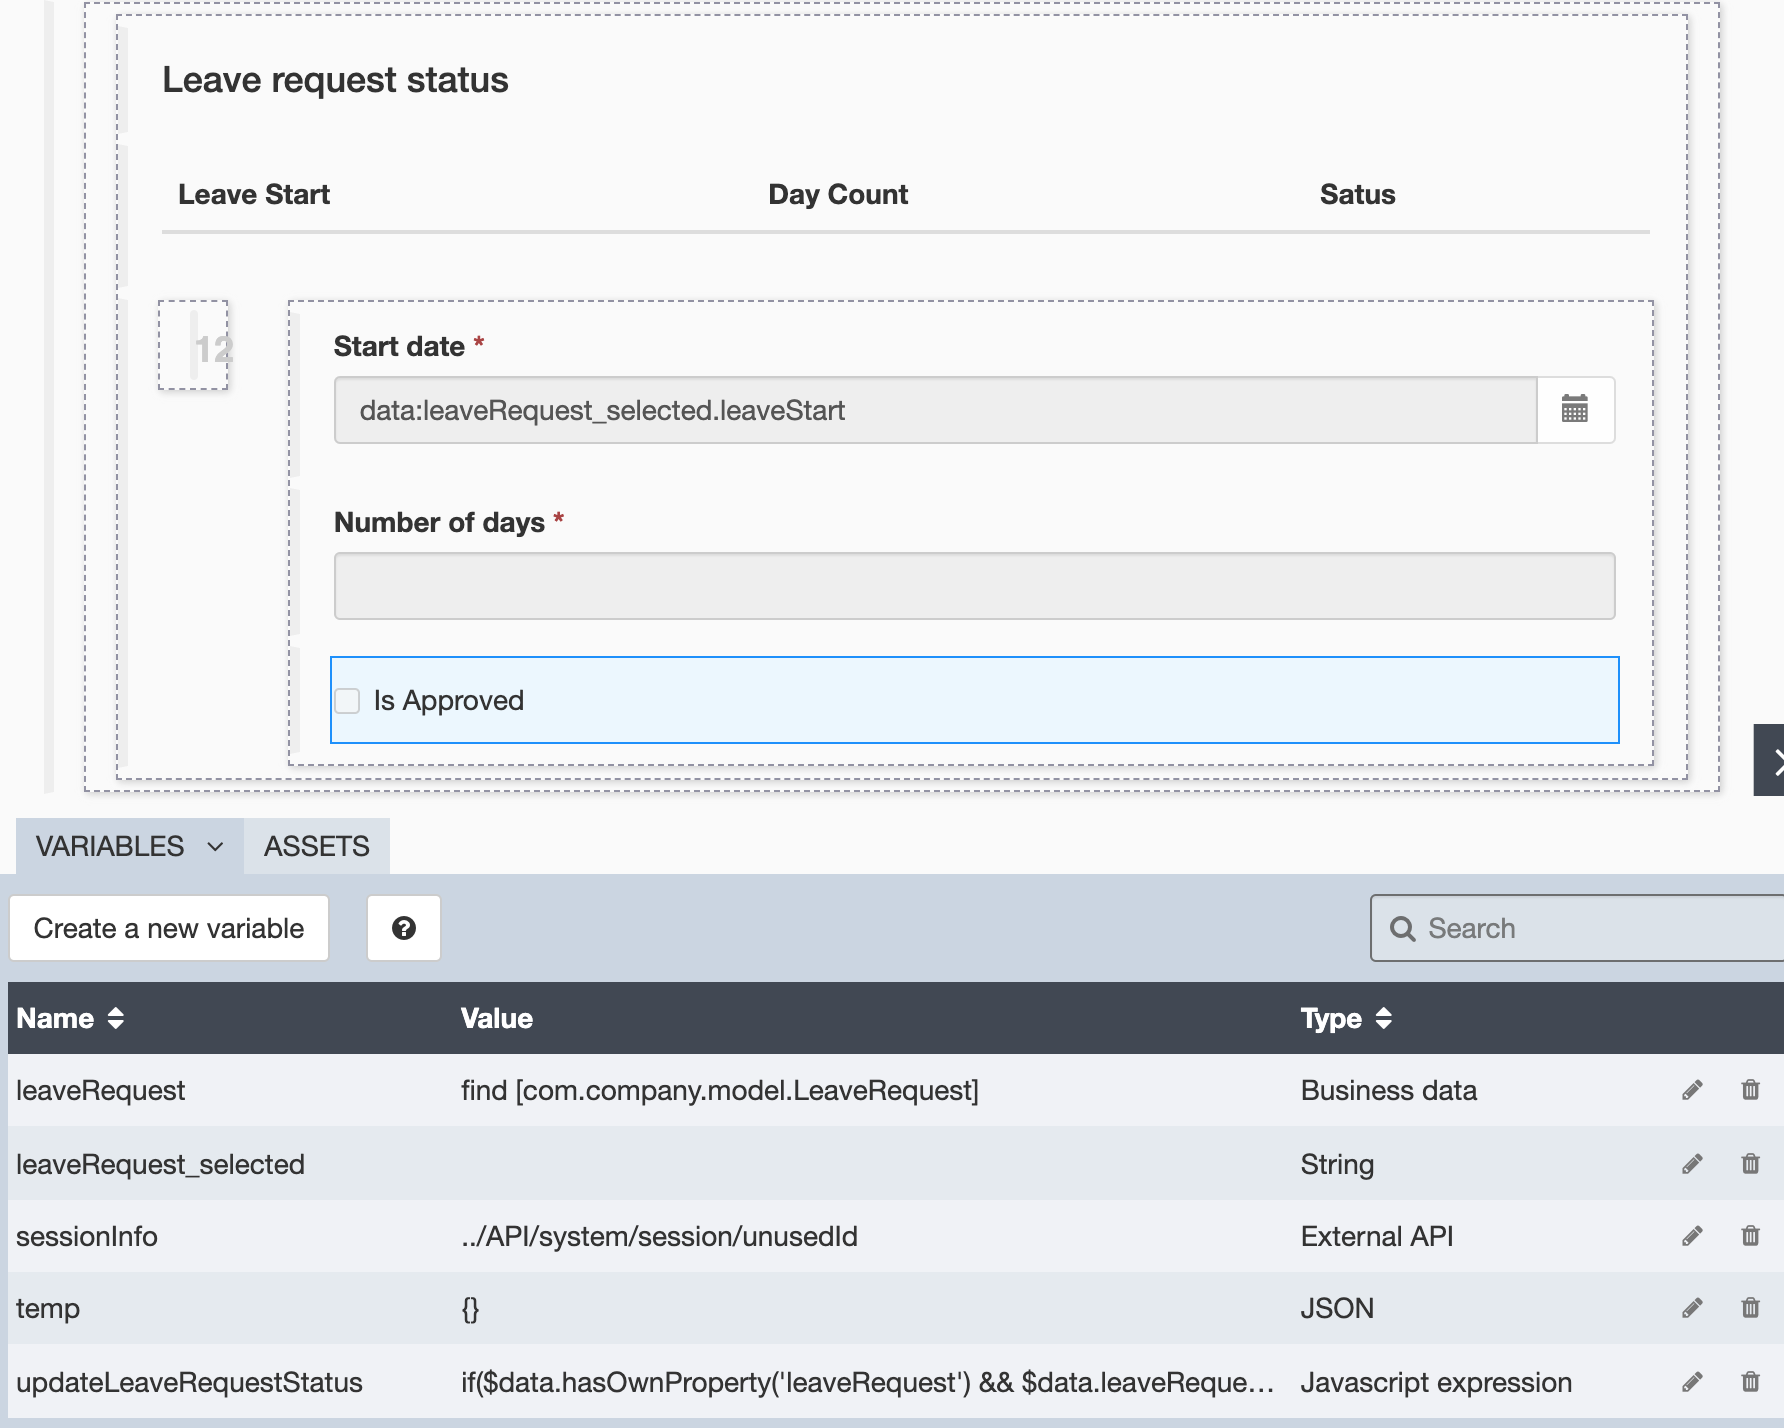
- The container should look like this:
- You can preview the page at anytime by clicking on Preview button
Tip: if you are logged in the Portal in the same browser, the current leave request will be displayed.
-
Add a new form container:
- Go back to edit your page in the UI Designer
- Drag a form container from the palette and place it between the two titles
-
Create a new variable to store the new leave request values:
- Click on Create a new variable
- Name it newLeaveRequest
- Choose JSON type
- Click Save
-
Create a fragment from the FillLeaveRequest form that will be reused in the page:
- Go back to UI Designer home page
- Select LeaveRequestStatus page in the Pages tab and click to open it
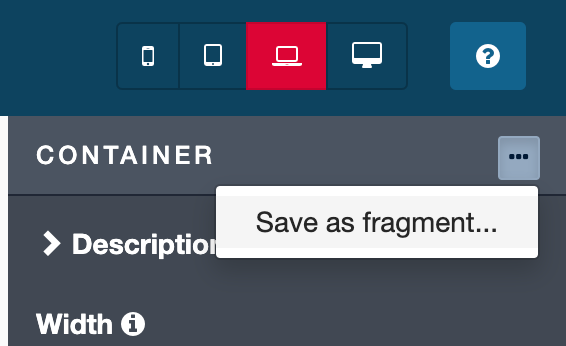
- On the fillLeaveRequest form, select the container with the 2 widgets Leave Start and DayCount
- In the right panel, click on ... and select Save as fragment
- Name it NewLeaveRequestFragment
- Click on Save. A new menu tab appears at the left side of UI Designer.

- Save the form and go back to UI Designer home page
-
Add the fragment in the form container and configure it:
- Drag and drop the NewLeaveRequestFragment from the left menu to the form container.
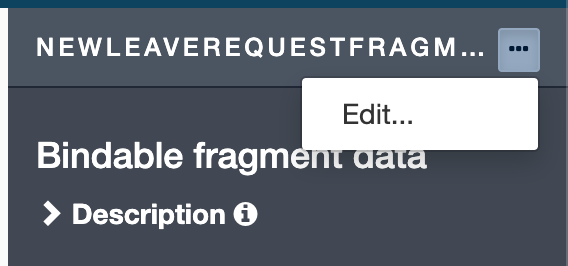
- Select the fragment and click on Edit... to configure the fragment's data
- Click on Create a new variable
- Name it dataExt
- Click on Yes to expose the fragment data to the page and Save the variable
- Select the DatePicker widget
- In the field Value replace formInput by dataExt
- Select the Input widget and replace formInput by dataExt in the field Value
- Click on Save
-
Bind the fragment data with the page data:
- Go back to the LeaveRequestStatus application page
- In the configuration panel, in Bindable fragment data add the variable newLeaveRequest
-
Create a new variable to store the process information:
- Click on Create a new variable
- Name it processDefinitionInfo
- Choose External API type
- In the field API URL, enter:
../API/bpm/process?p=0&c=100&o=version%20DESC&f=name=LeaveRequest
-
Add a submit button in the form container:
- Drag the Button widget from the palette and place it in the form container below the two widgets
- Enter Create a new request in the field Label
- Set Alignment as Center
- Set Style as Primary
- Select POST in the Action drop-down list
- Click on fx to switch the Data sent on click field mode and then enter newLeaveRequest
- In the field URL to call, enter:
../API/bpm/process/{{processDefinitionInfo[0].id}}/instantiation - In the field Target URL on success, enter:
/bonita/apps/leave-request - Save the page
- Click on Preview
- The page should look like that:
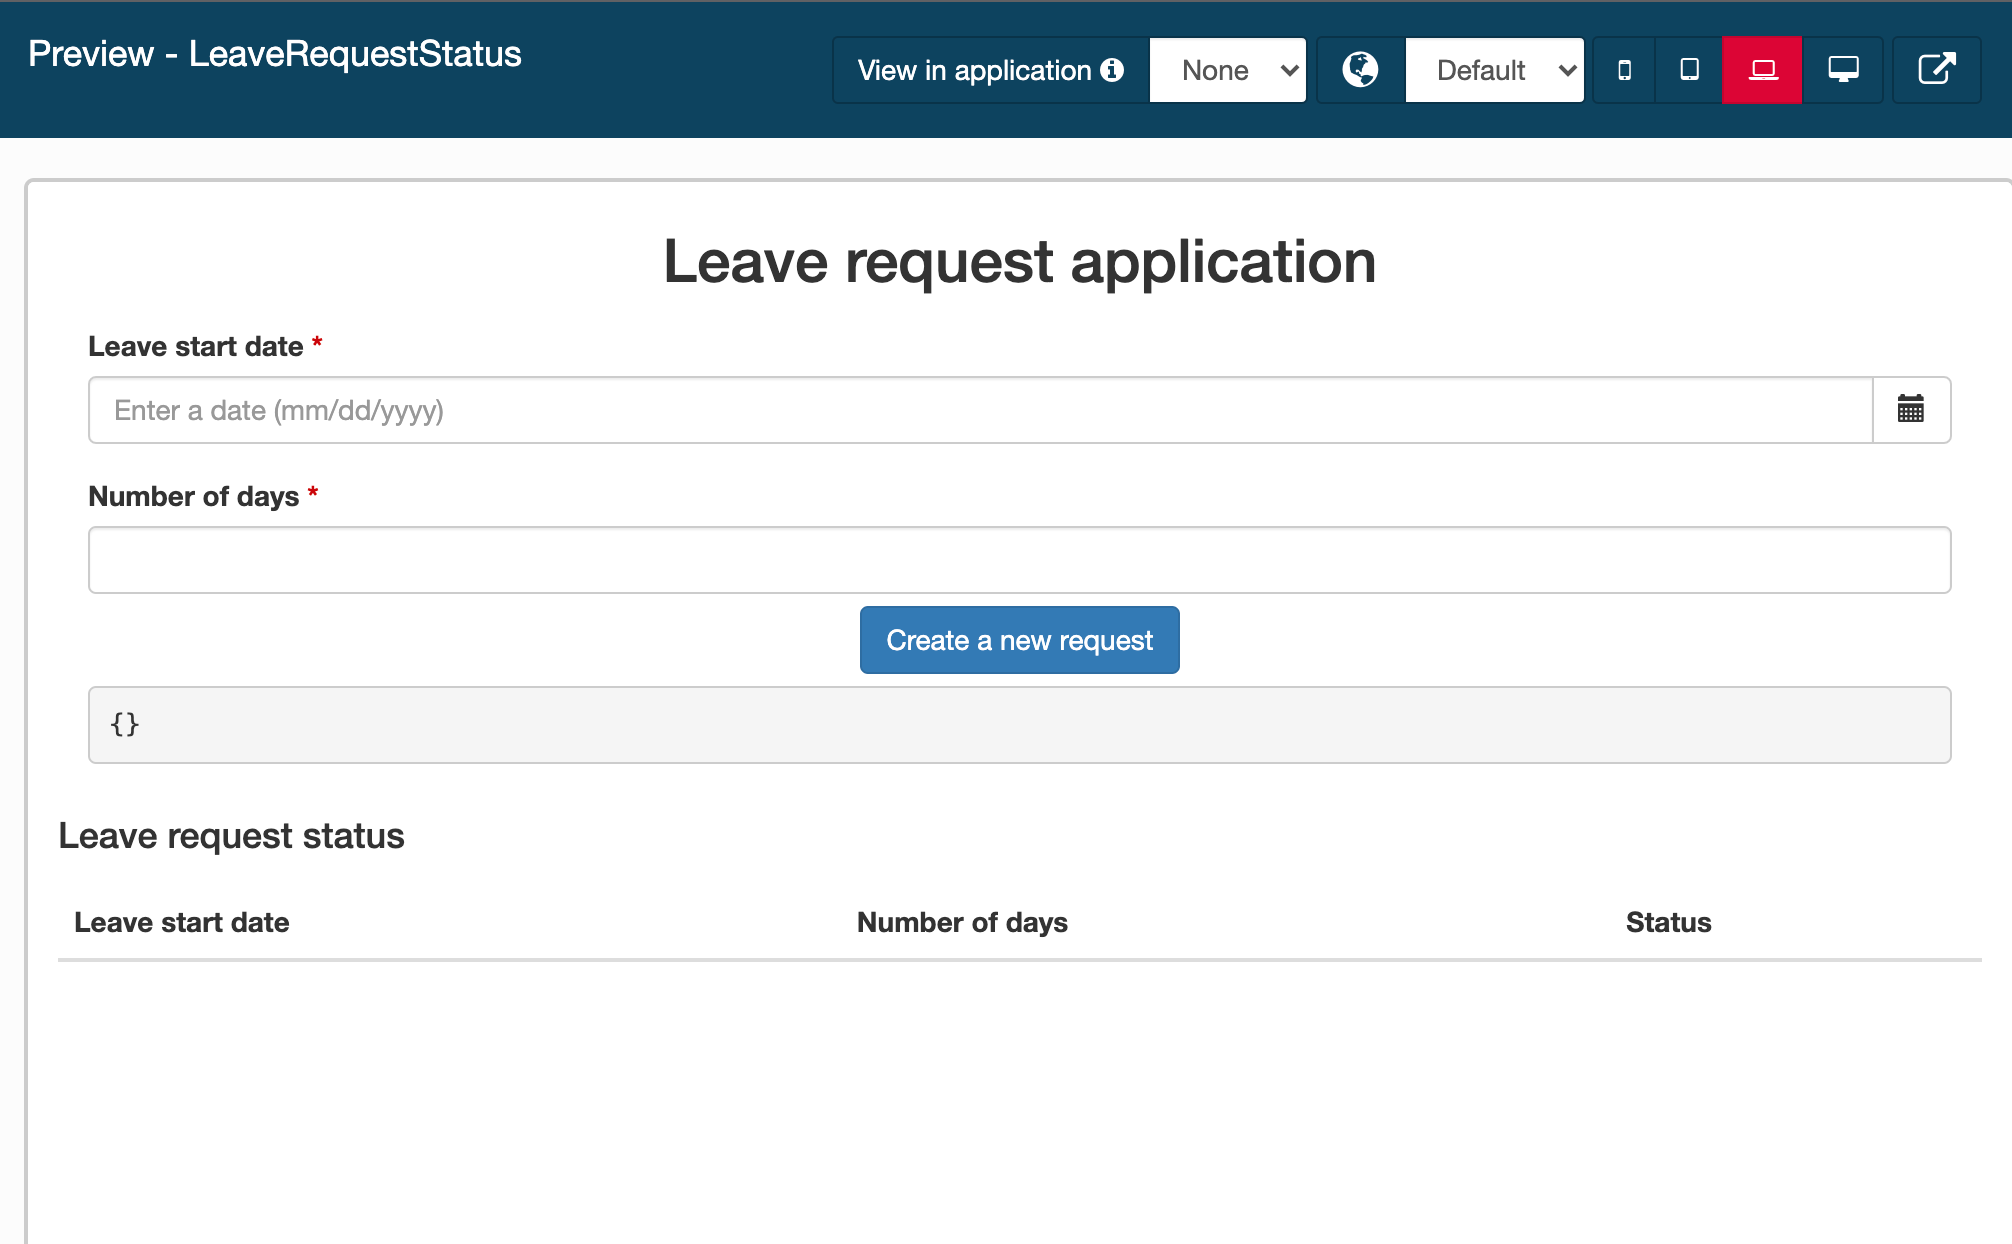 You can click on Preview to verify the page is displayed correctly.
 -
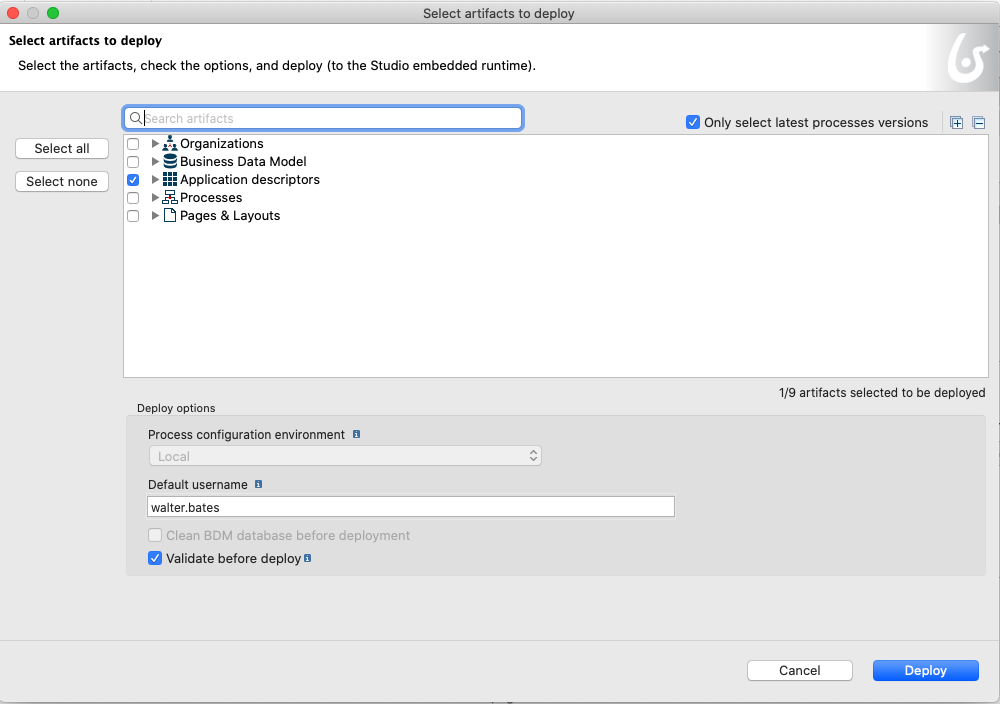
Deploy again the application from Bonita Studio:
- Click on button Deploy
- A deployment window opens. Click on Deploy (B)
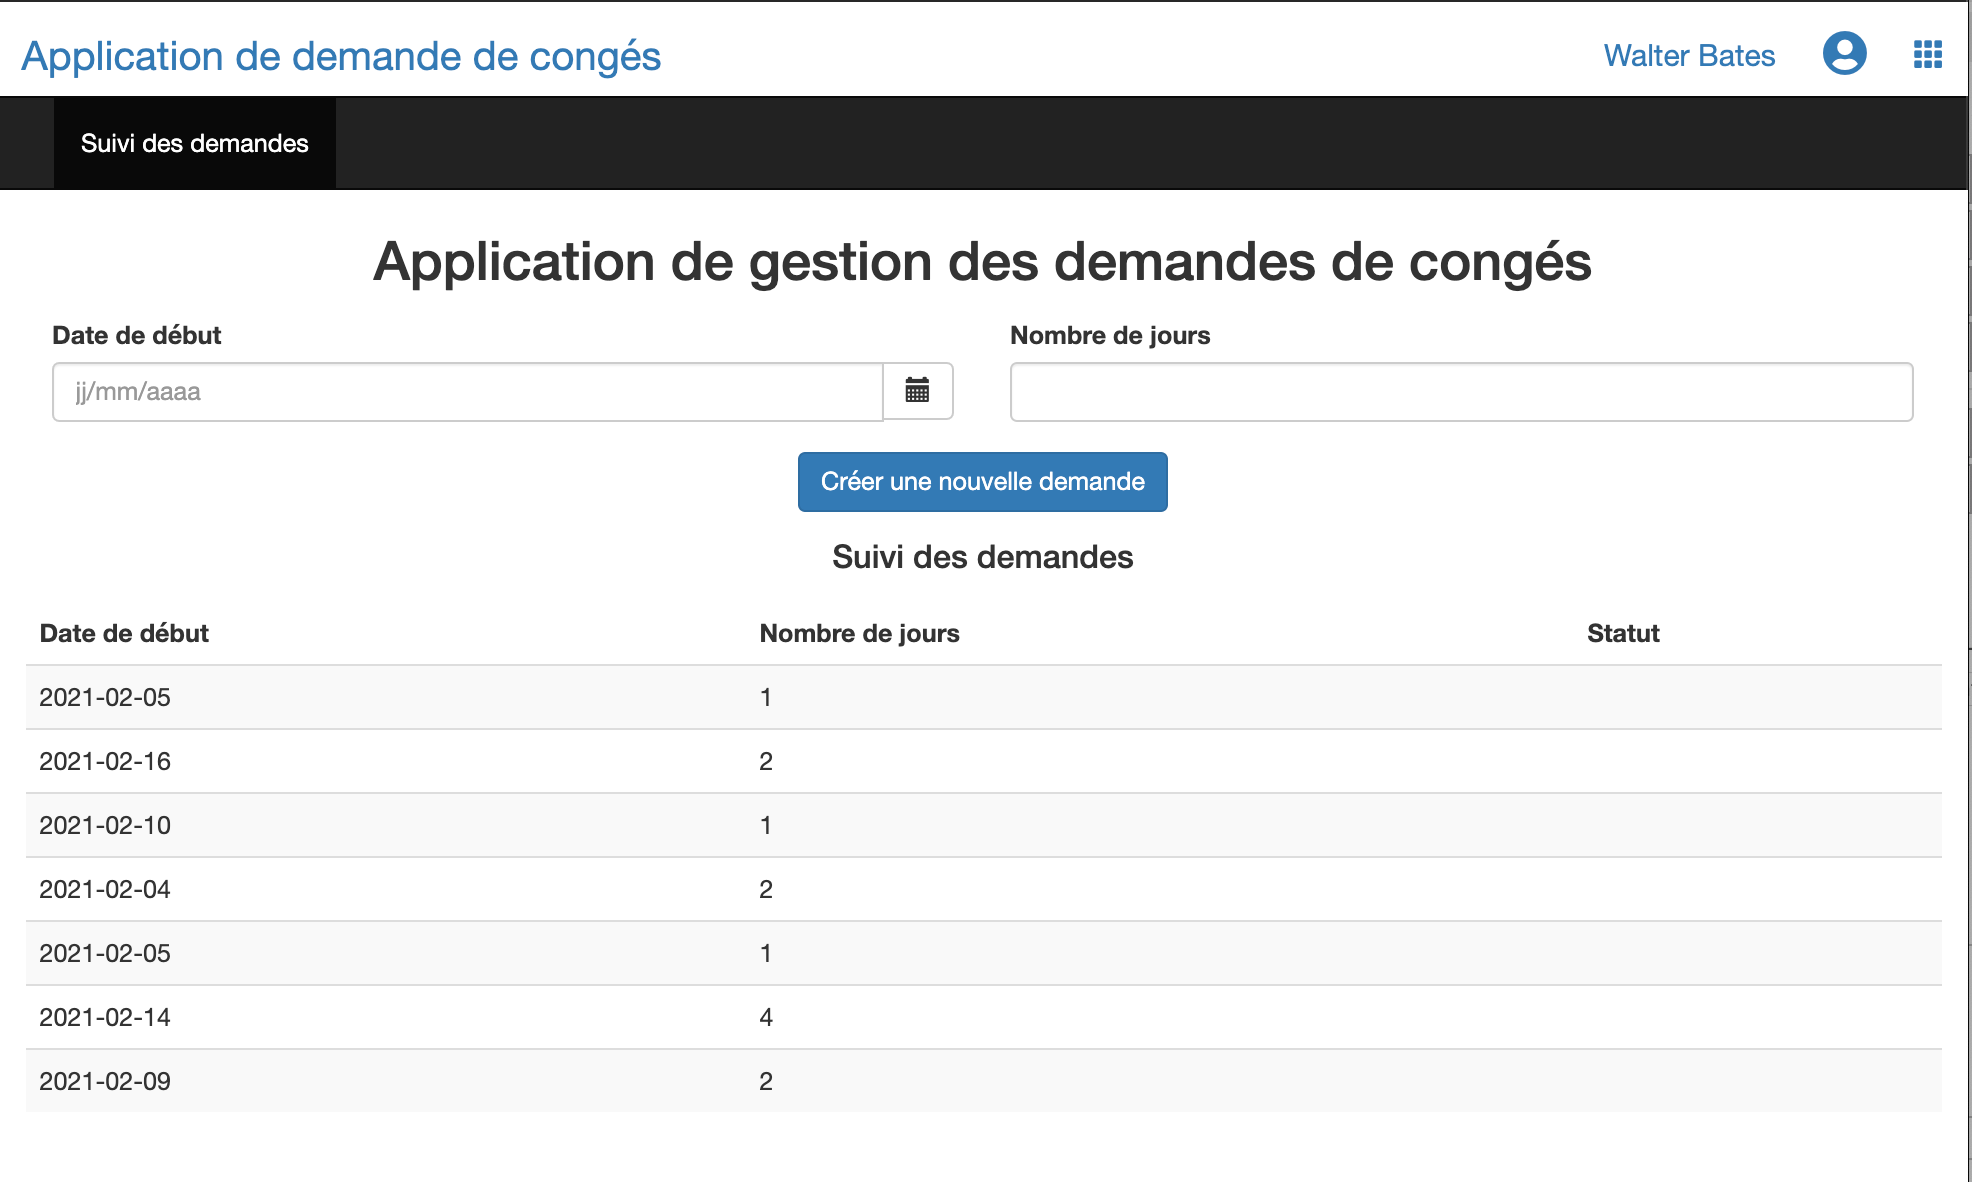
- To open the application, select Leave requests application as User.
- Click on Open.

The application should look like this once deployed :
And that's it!