Exercise 3 - Creating forms
Goal
The goal of this exercise is to provide simplified but user friendly forms for the execution of the process.
Instructions overview
Duplicate the process diagram from the previous exercise to create a 2.1.0 version.
Create the following forms:
- A case instantiation form at pool level that sets the leaveStart and dayCount attribute of leaveRequest business variable
- A form for the Validate request task that displays the requestor user details, the leaveStart and dayCount data in read-only mode and that sets the isApproved data
Step by step instructions
-
Duplicate the process diagram from the previous exercise to create a 2.1.0 version
-
Create a case instantiation form:
- Select the process pool
- Navigate to the Execution / Instantiation form tab
- Click on the pencil next to the Target form input
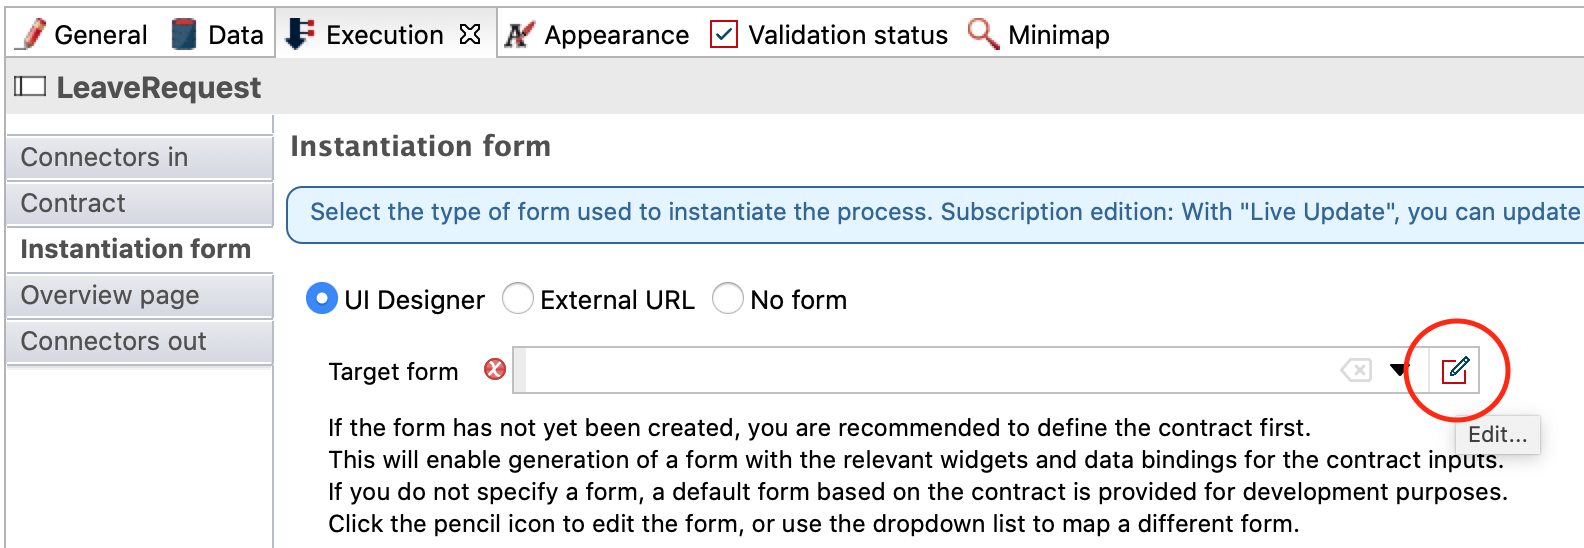
- This will open the UI Designer in a browser with a form automatically generated from your instantiation contract
-
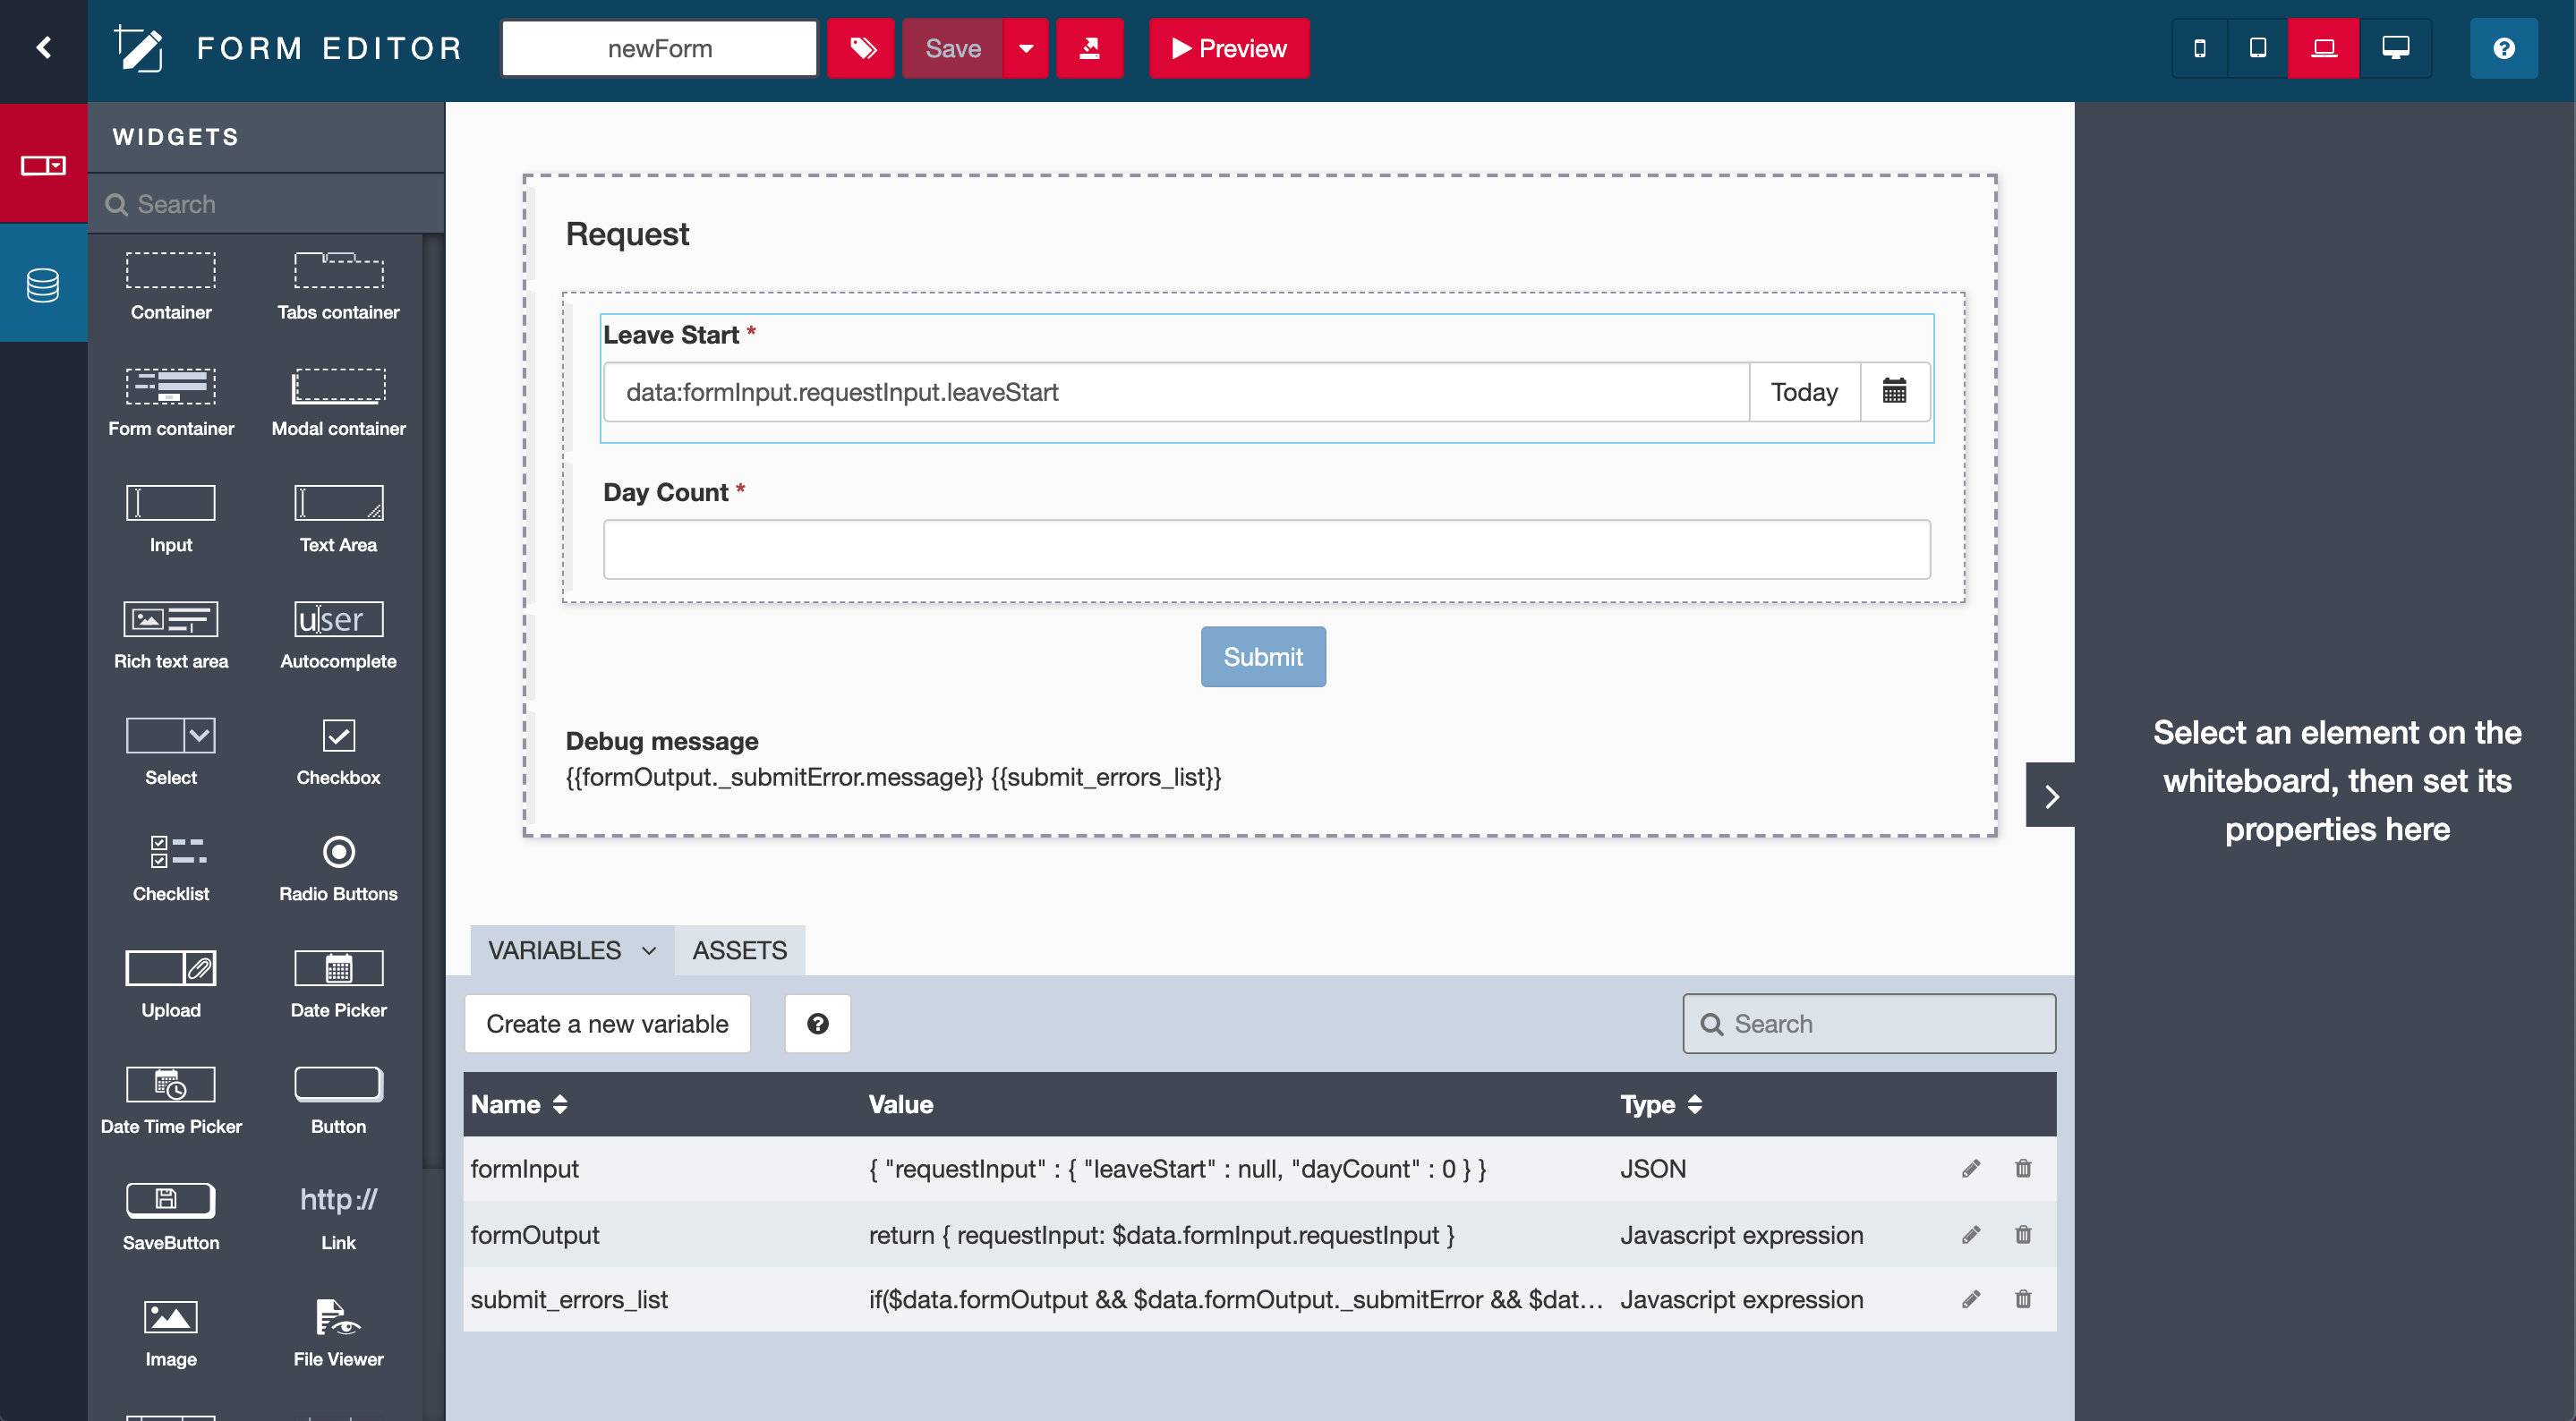
Rename the form:
- Use the text field on top of the screen to rename the form from newForm to fillLeaveRequest (this is a technical name so it should not contain spaces or special characters)
- Click on Save
-
Update the form title:
- Select the top most widget Request
- In the section on the right edit the following properties:
Property Value Text Fill a new leave request Text level Level 2 Alignment center -
Update the Leave Start widget:
- Select the Leave Start widget and edit the following properties:
Property Value Text Leave start date Show Today button no -
Update the Day Count widget:
- Select the Day Count widget and edit the following properties:
Property Value Label Number of days Min value (not to be confused with the Value min length property) 1 -
Update the Submit widget
- Select the Submit widget
- Change the label to Submit request
-
Check the form's appearance:
- Make sure that the form looks like this in the editor:

- Click on the Save button at the top of the screen
- Click on the Preview button at the top of the screen
- The form should look like this:
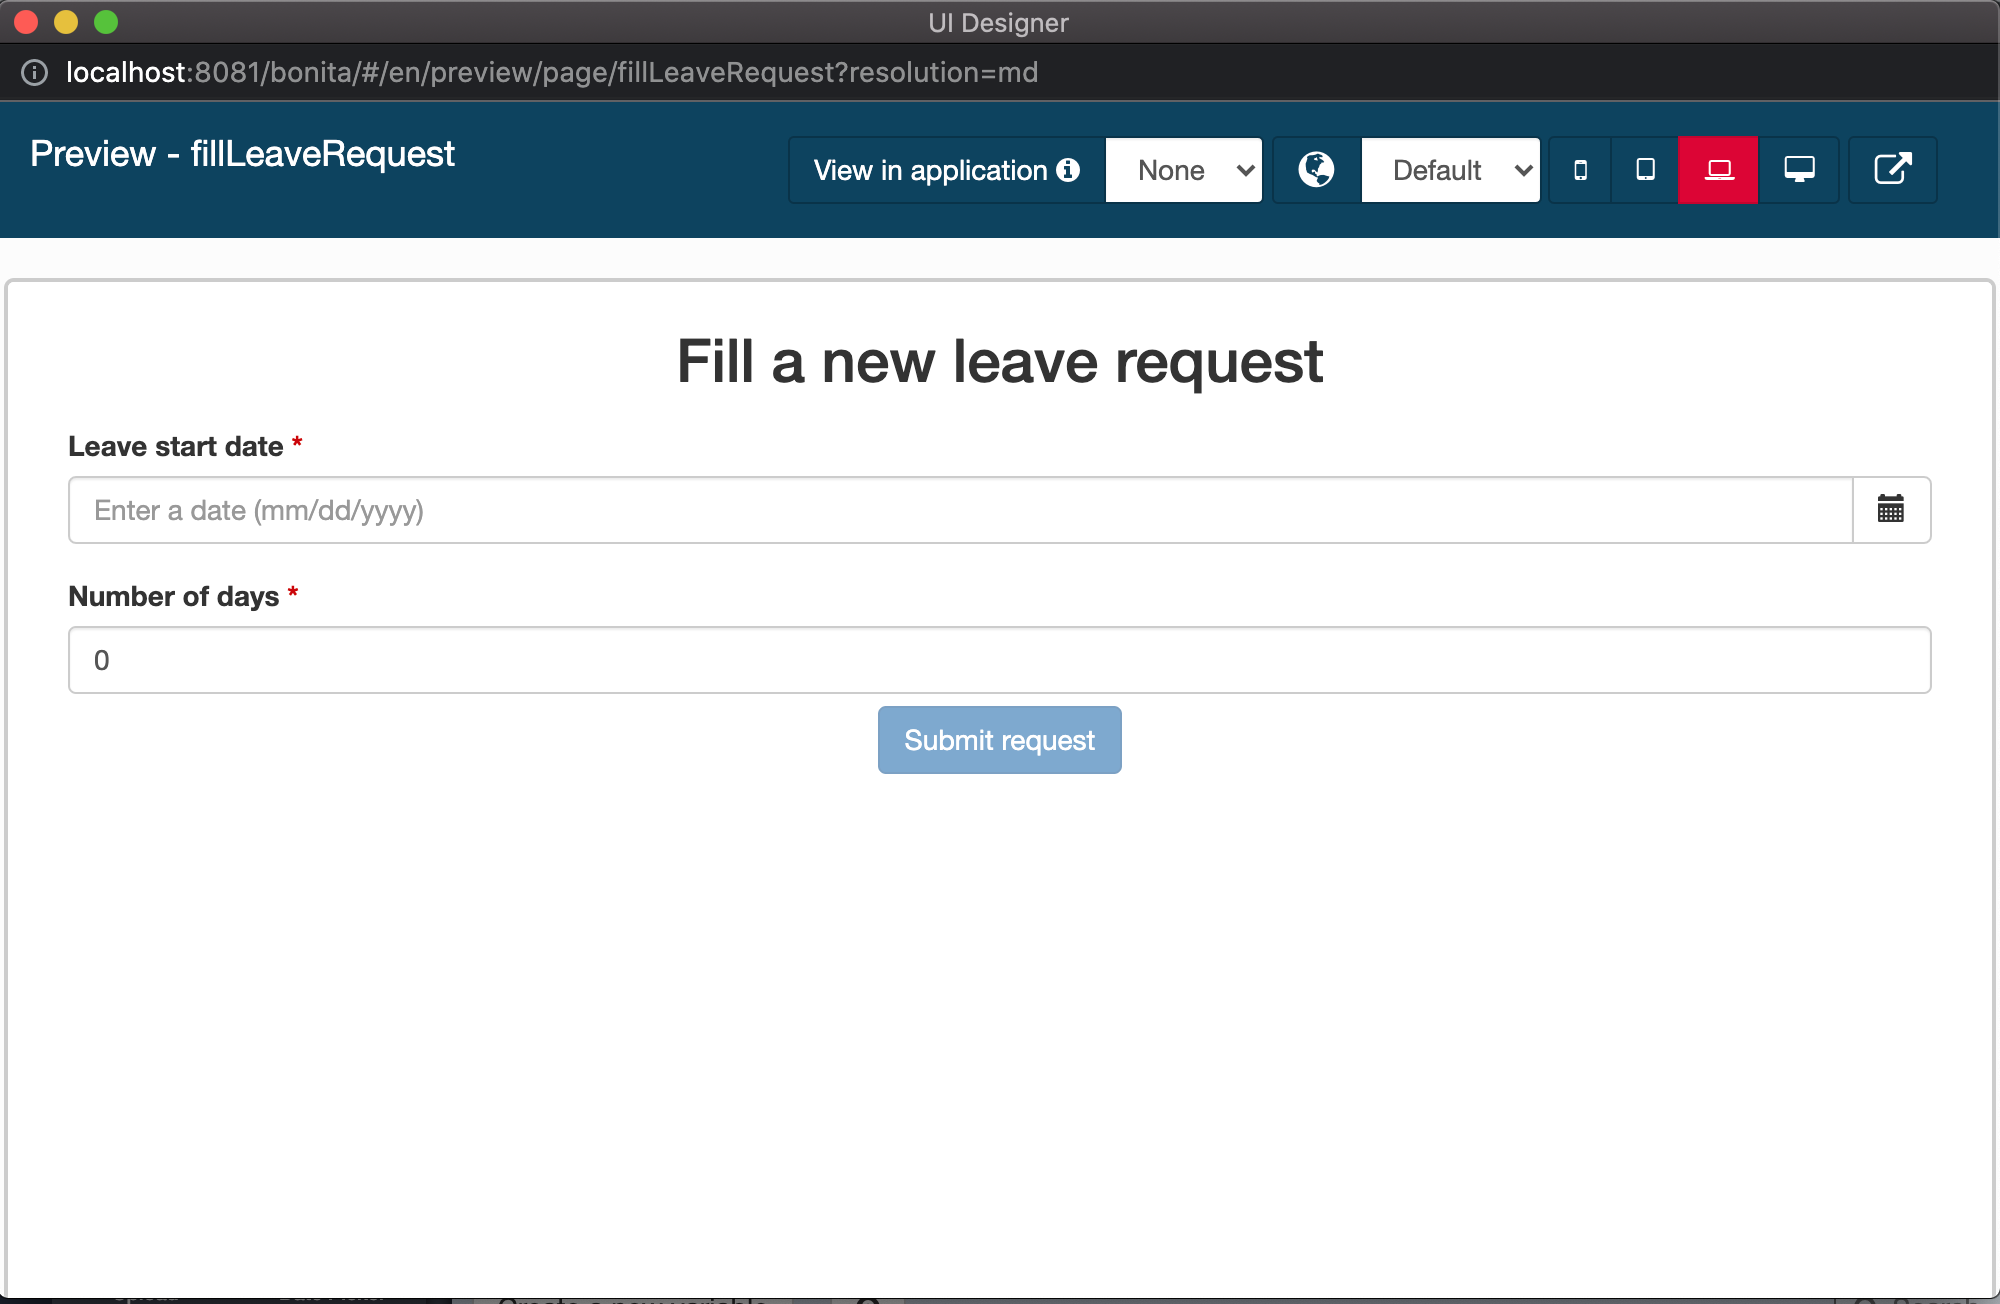
- Verify the following points:
- The widget presenting the error is not visible
- It is possible to test the preview on different devices, from the mobile phone to the big screen
- The Submit button is disabled by default (this is due to the validation provided by the form container)
- The Submit button is enabled when the form is valid
Note: the form cannot be submitted from the preview mode even if it is valid.
-
Close the preview window
-
Create a form for the Validate request task:
- In the Studio, select the Validate request task
- Navigate to the Execution / Form tab
- Click on the Pencil next to the Target form input to open a new form in the UI Designer
- Answer Yes to the question regarding generation of read-only widgets
Note: the form was automatically generated from the BDM and the contract, and displays read-only data from the BDM that is not expected by the contract at this stage.
-
Rename the form:
- In the UI Designer, rename the form into validateLeaveRequest and save it
-
Retrieve the requestor's user data
- Click on the Create a new variable button to declare a new variable with the following properties:
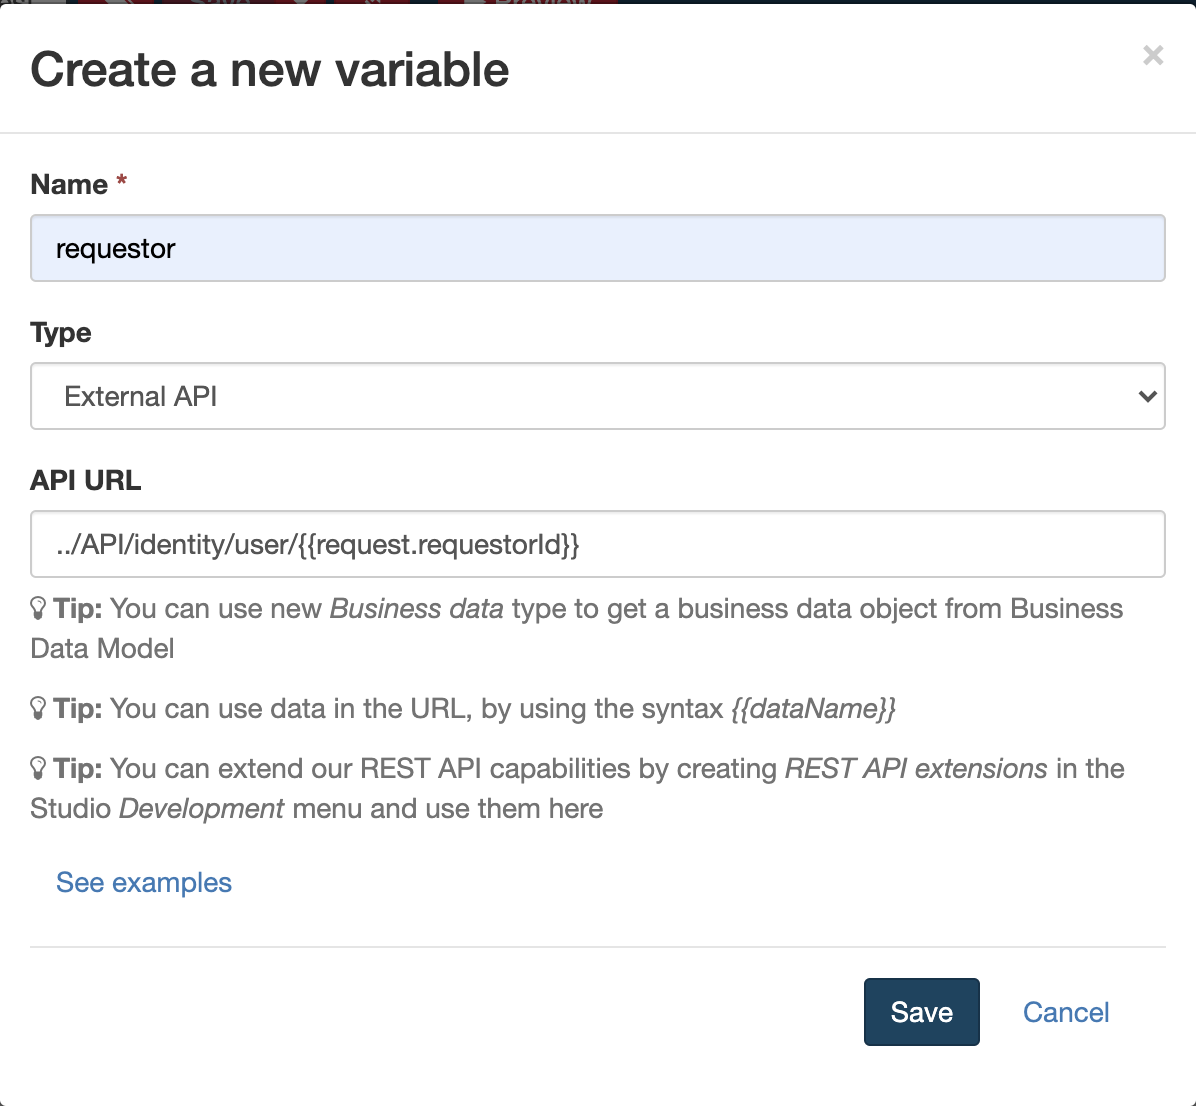
Note: you can use the examples that allow you to automatically retrieve API call patterns. Here we will retrieve
identity APIbecause we are looking for information related to a user. -
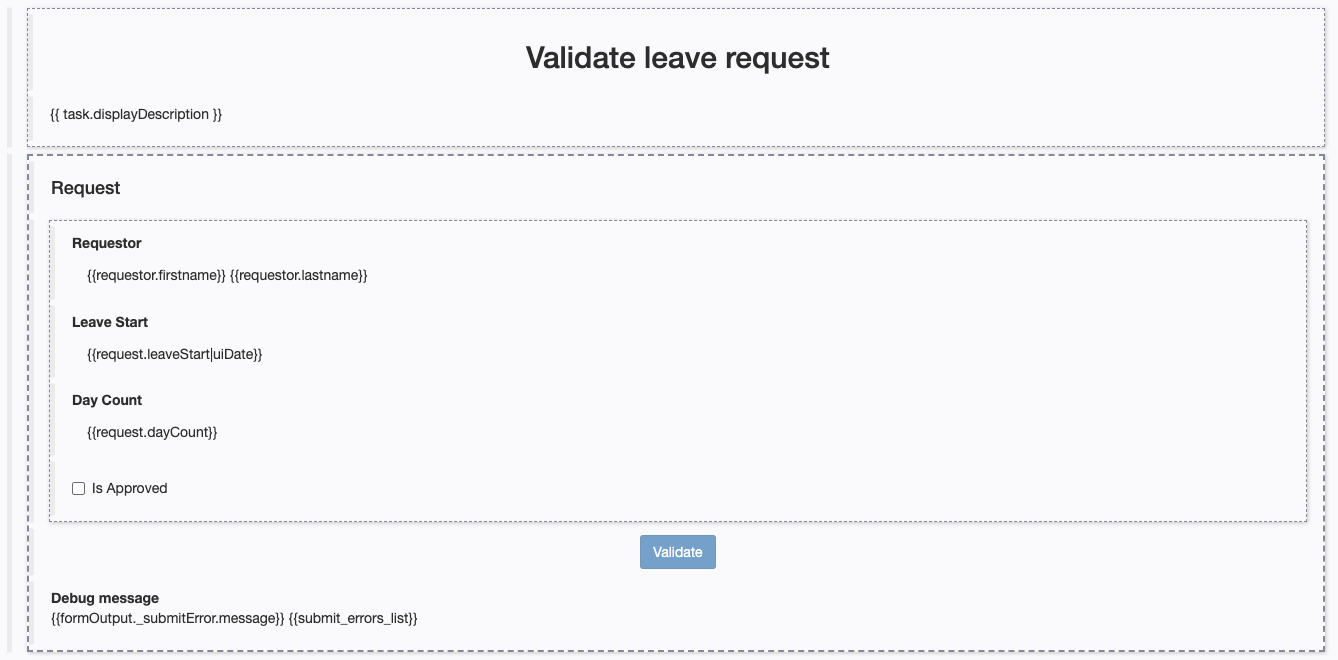
Edit the form title:
- Select the Title widget located at the top of the form
- Configure the widget with the following settings:
Property Value Text Validate leave request Title level Level 2 -
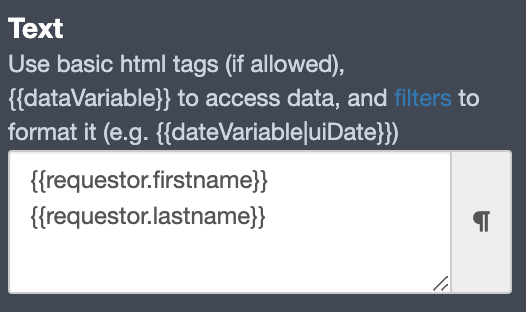
Modify the text widget Requestor id to display requestor first and last names:
- Change the label value to Requestor
- Configure the widget with the following settings:
-
Modifiy the Submit widget:
- Select the widget
- Modify the label to Validate
-
Check the form's appearance
- Make sure that the form looks like this in the editor:
-
Save the form:
- Use the top Save button to save the form
-
Test the process execution:
- Run the process from the Studio and execute all of its steps
- Validate that the proper execution path was taken at the end of process execution by looking at the case history in the Bonita user application