Exercise 6 - Build a leave request application
Goal
The goal of this exercise is to build an application for users to create and manage their leave requests.
Instructions overview
Open the UI Designer and create a new Application page named LeaveRequestStatus to follow the progress of the connected user leave request.
This page will contain one "multiple container" that list the on-going leave requests. For each request, the start date, number of days and approval status will be displayed.
Add a link to the instantiation form to start a new leave request.
Create a new application. Then add the LeaveRequestStatus page in the application.
Deploy the application page using the Deploy button from the Studio.
Access the application using the generated URL.
Step by step instructions
-
Create a new page:
- In the Studio, click on the UI Designer button
- Click on the Create button
- Select Application page
- Set the name to: LeaveRequestStatus
- Click on Create
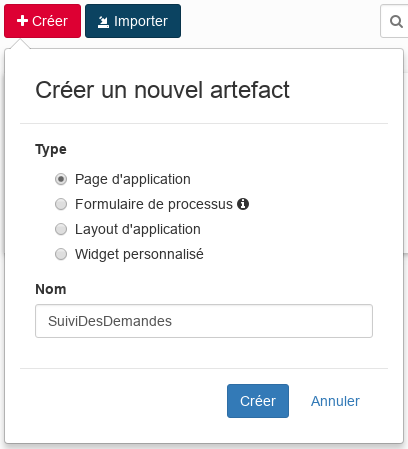
- You should now be on the designer page
-
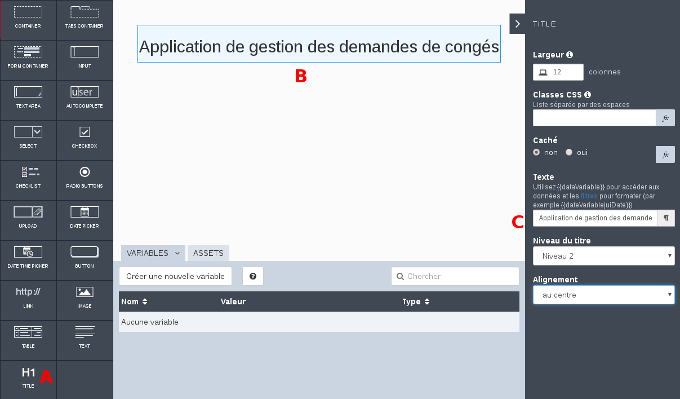
Add a title to your page:
- Drag the widget Title (A) from the palette to the top of the page (B)
- Select the widget
- On the right panel, enter Leave request application in the Text field (C)
- Select center for Alignment
-
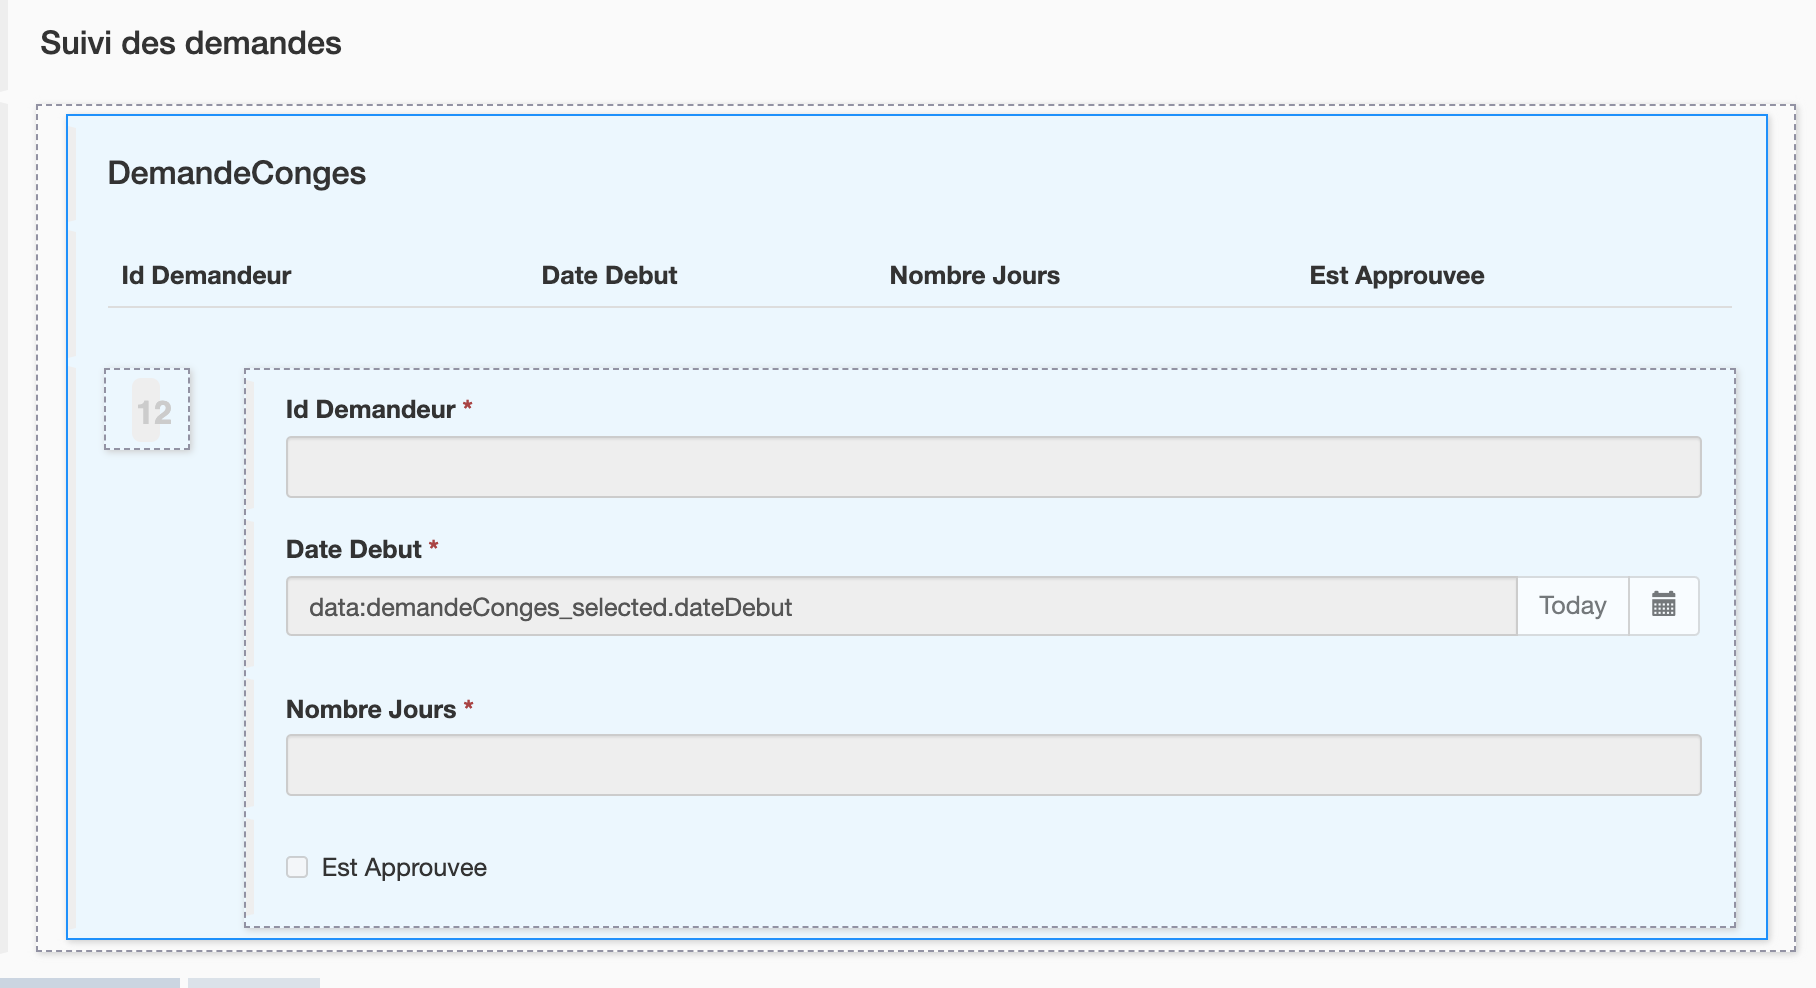
Create a variable to list the leave request:
- Click on Data model icon

- Drag and drop LeaveRequest onto the page just below the main title (a dotted line should appear)
- Keep the name by default leaveRequest
- Select the "Find query
- Click on Save button
A multiple container is automatically generated with a table showing the attributes of the LeaveRequest object.
- Click on Data model icon
-
Modify the container title like follows:
Property Value Title Leave request status Title level Level 4 Alignment left -
Modify the labels of the widget Table:
- Select the widget Table
- In the right panel, in the Headers field, delete RequestorId.
- Replace Leave Start with Start date, Day Count with Number of days.
-
Display the information in the columns of the table more clearly :
- In the right panel, in the field Column keys, delete requestorId.
- Delete the Input widget RequestorId in the details container because this information is not useful
-
Select the Date picker widget called Leave Start and edit the following properties:
Property Value Read-Only Yes Label Start date Show Today button No -
Select the Input widget called Day Count and edit the following properties:
Property Value Read-Only Yes Label Number of days - Save the page
- The page should look like this:

- You can preview the page at anytime by clicking on Preview button
Tip: if you are logged in the Portal in the same browser, the current leave request will be displayed.
-
Add a new Link widget:
- Drag a link widget from the palette and place it between the two titles
- In the field Text enter Create a new request
- In the field Type, select Process instanciation form
- In the field Process name add LeaveRequest
- In the field Alignment select center
- In the field Style select Primary
- Save the page
We will now deploy the application in the portal from the Studio.
-
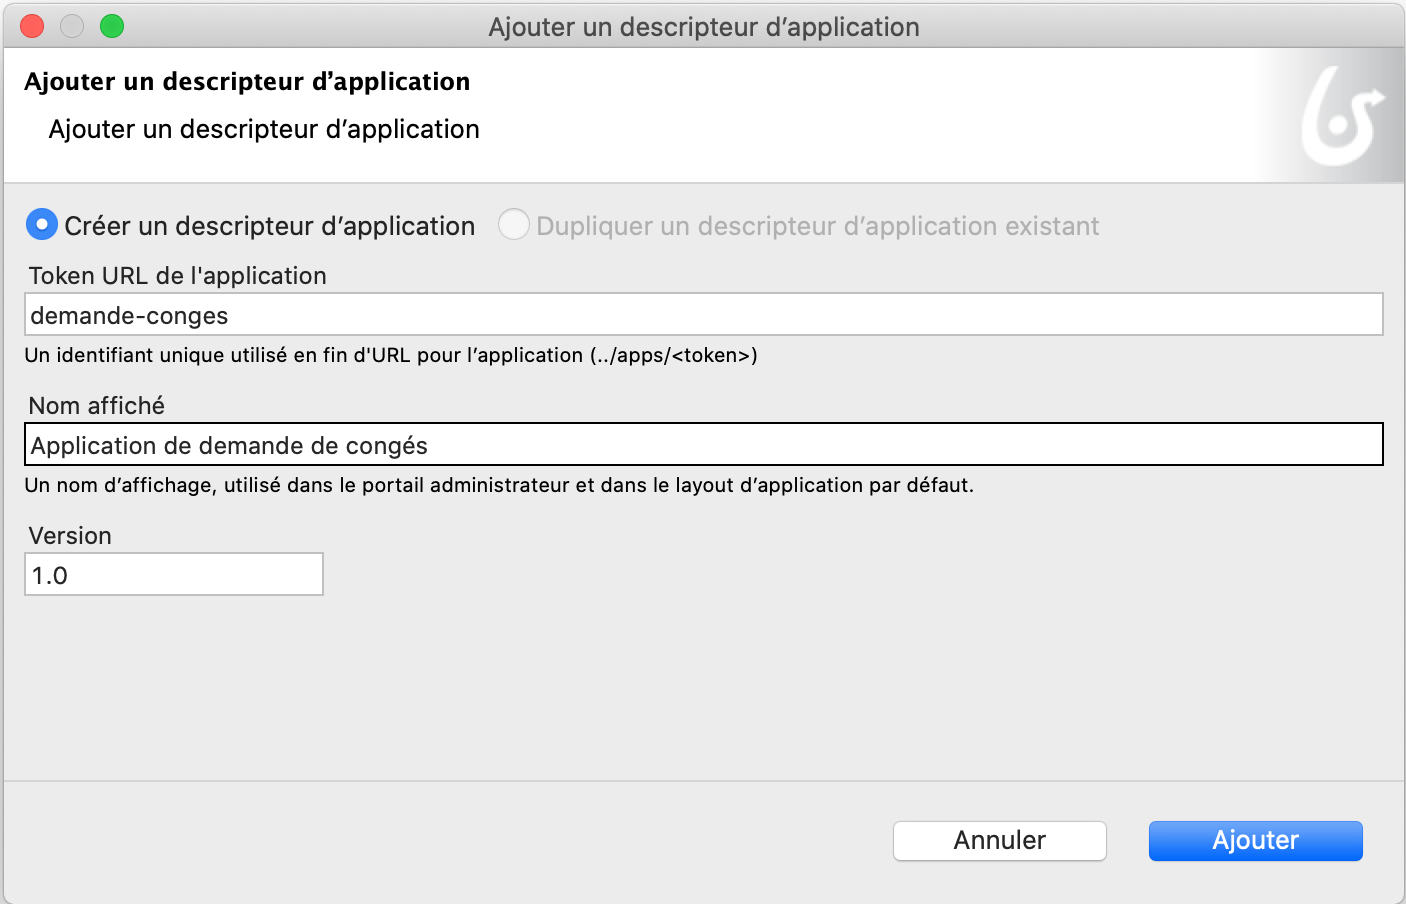
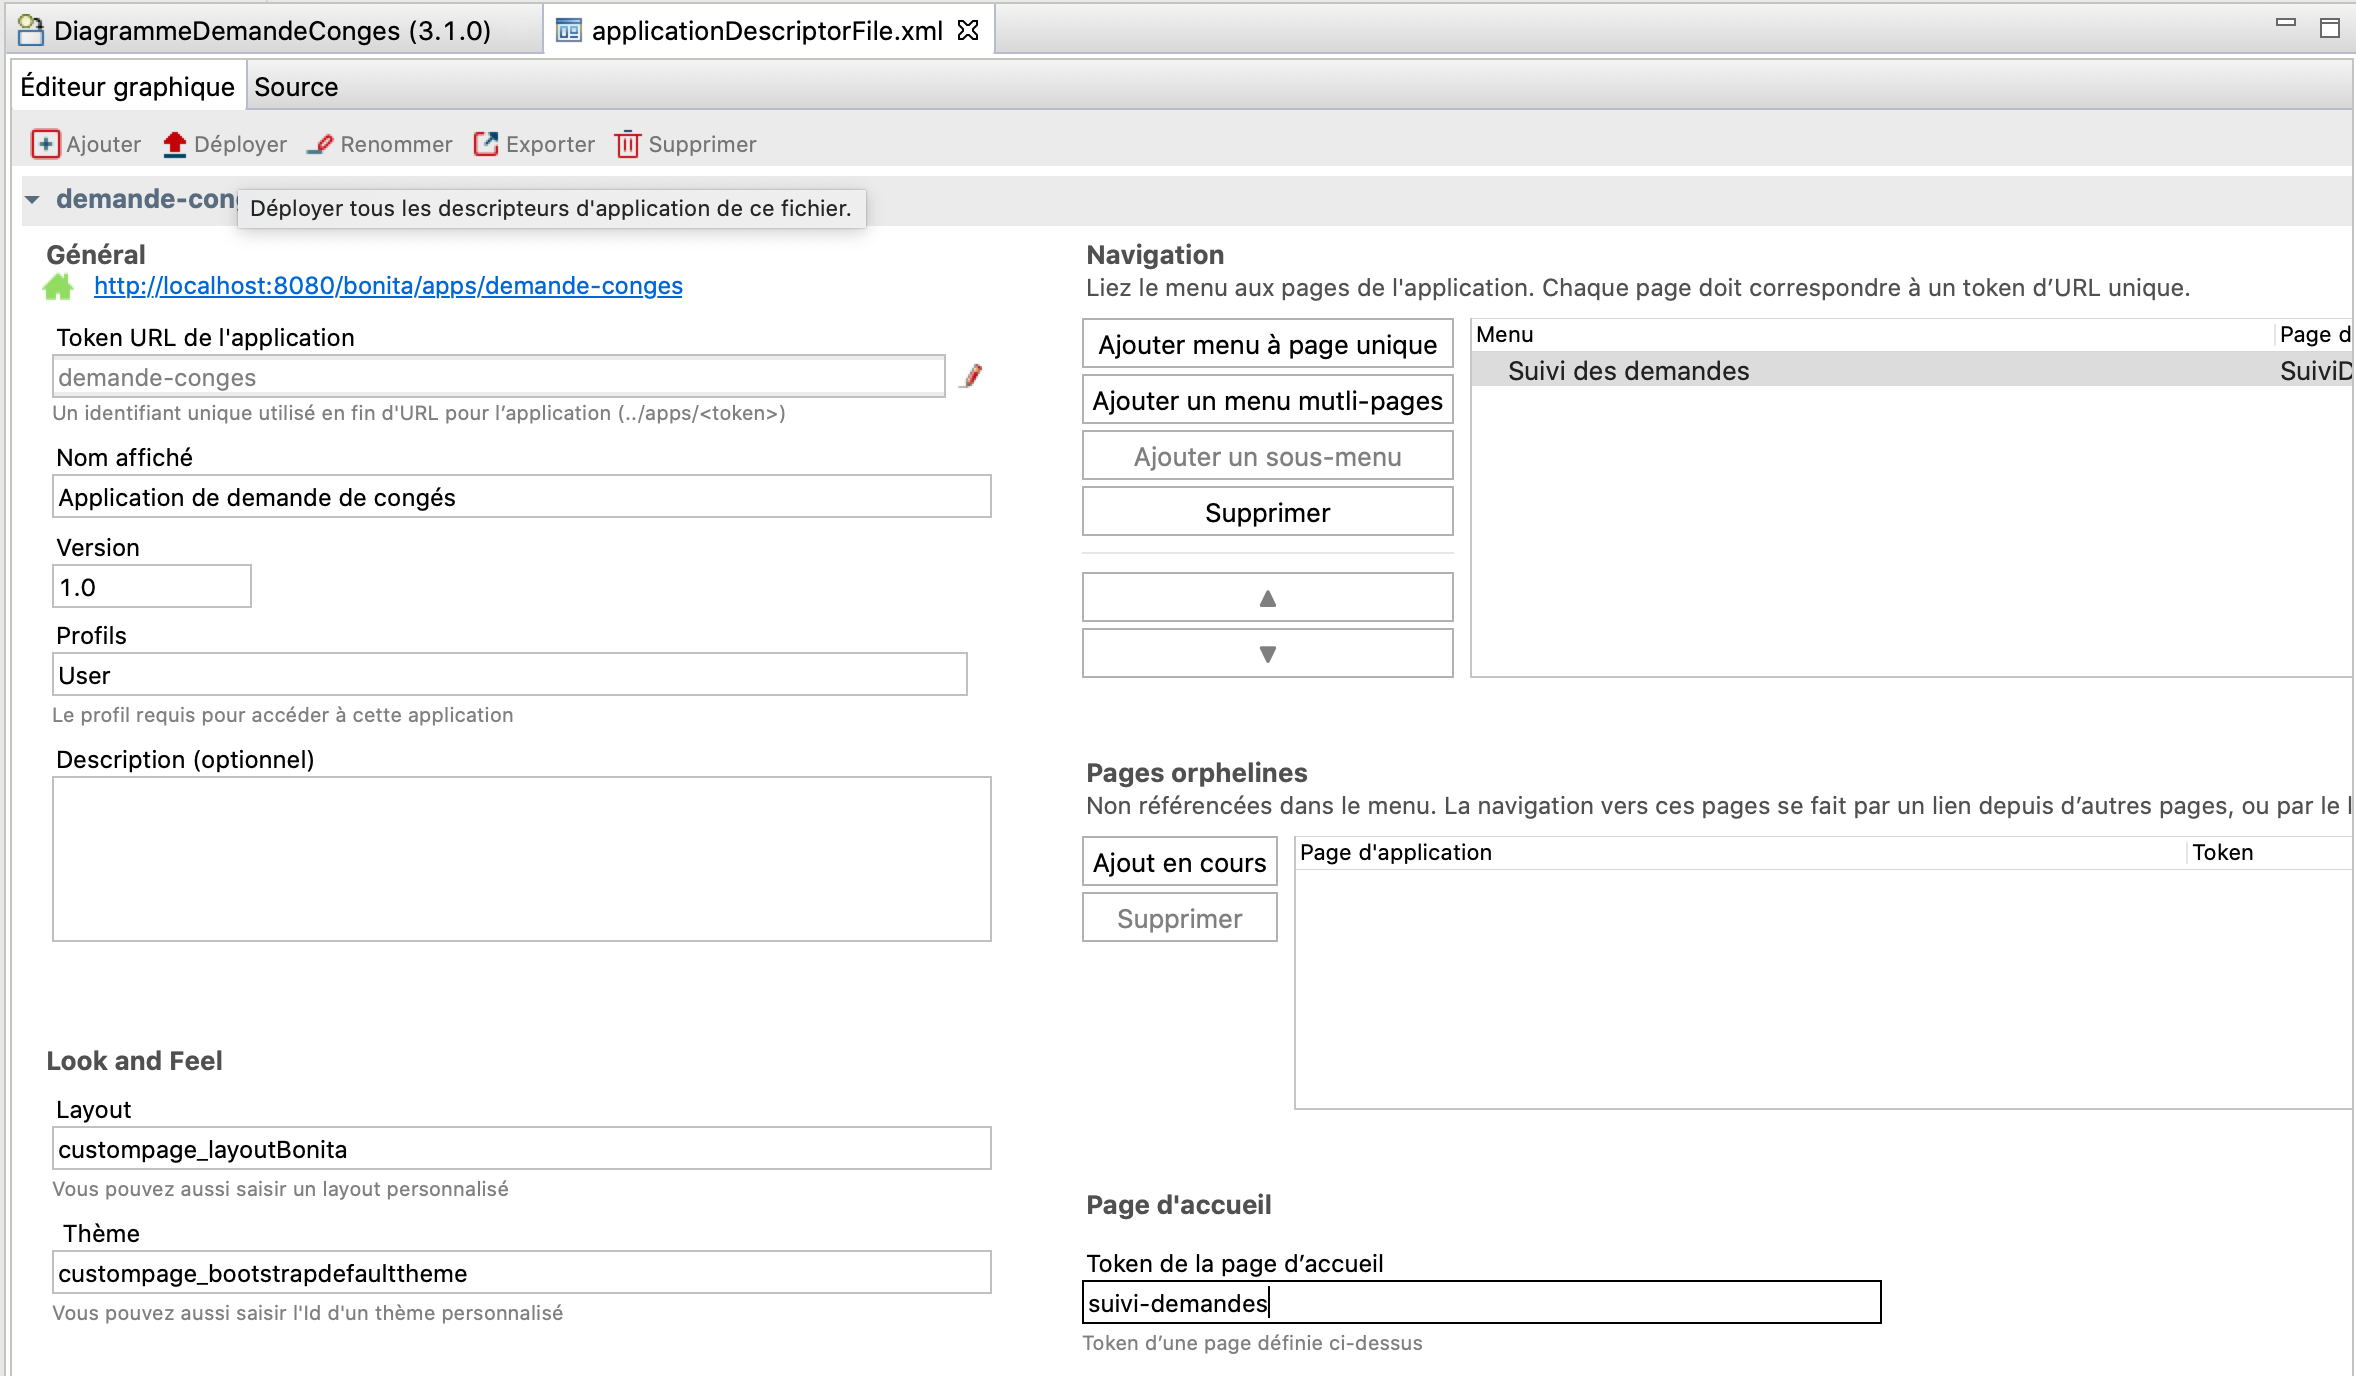
Add an application descriptor :
- In the Studio, in the Development/Application Descriptor menu select New. An .xml file is automatically initialized.
- Click Add an Application Descriptor.
- Enter leave-request in the field Application URL token.
- Enter Leave requests application in the field Displayed name.
- Click on the button Add.
-
Create a new application :
- In the Navigation menu, click Add one-page menu (A)
- Enter Requests follow-up in the field Menu.
- Select the custompage_LeaveRequestStatus page in the field Application Page (B)
- Enter leave-request in the Token field (C)

-
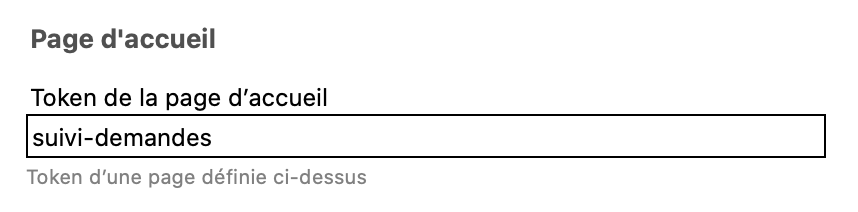
Define the Requests follow-up page as the application home page :
- Select the leave-request token from the Menu HomePage.
- Save
- Check that the configuration page looks like this :
- Select the leave-request token from the Menu HomePage.
-
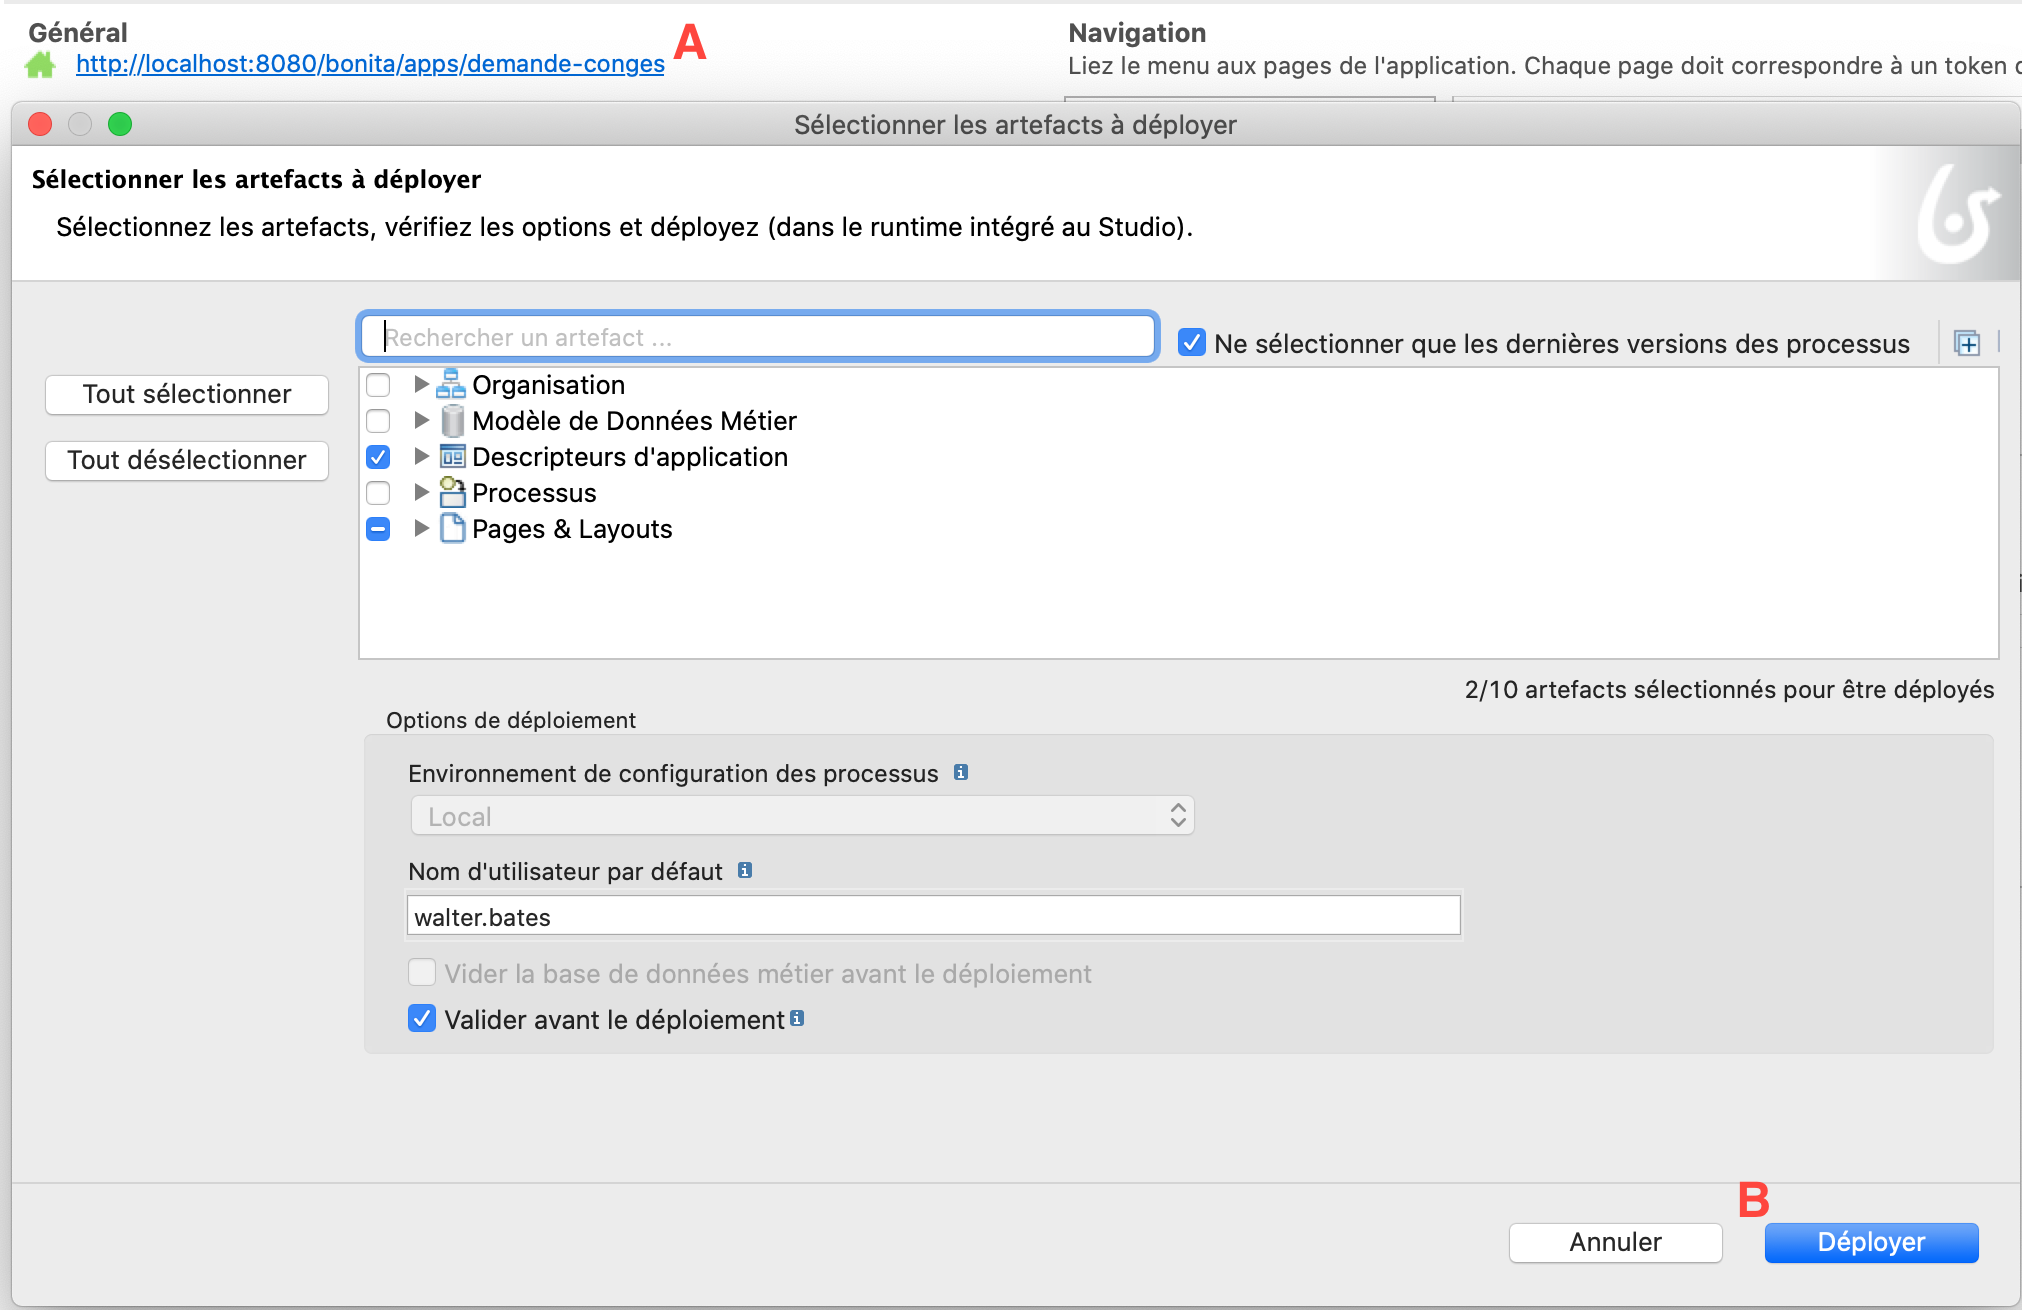
Deploy the application in the Portal:
- Click on the link http://localhost:8080/bonita/apps/leave-request to access the application. (A)
- A deployment window opens. Click on Deploy (B)
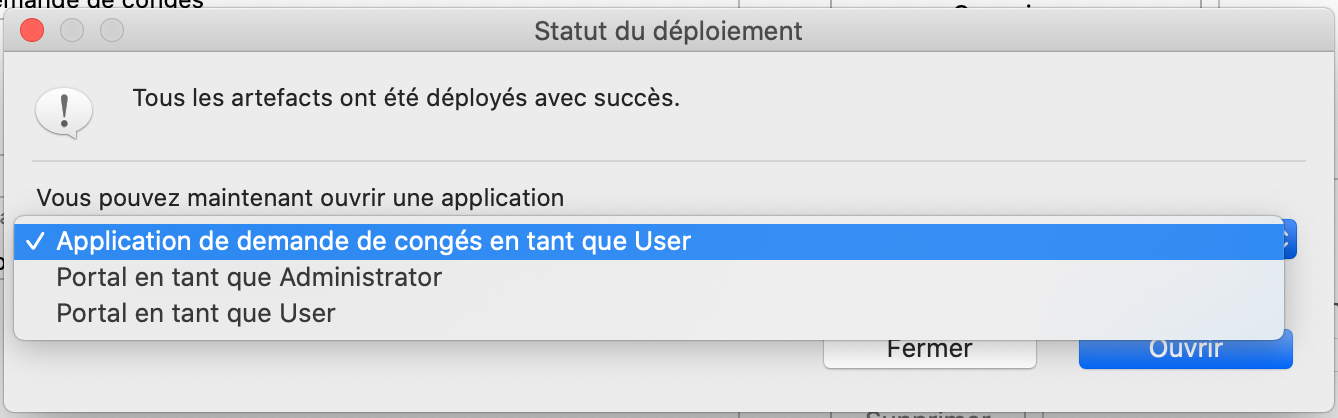
- To open the application, select Leave requests application as User.
- Click on Open.
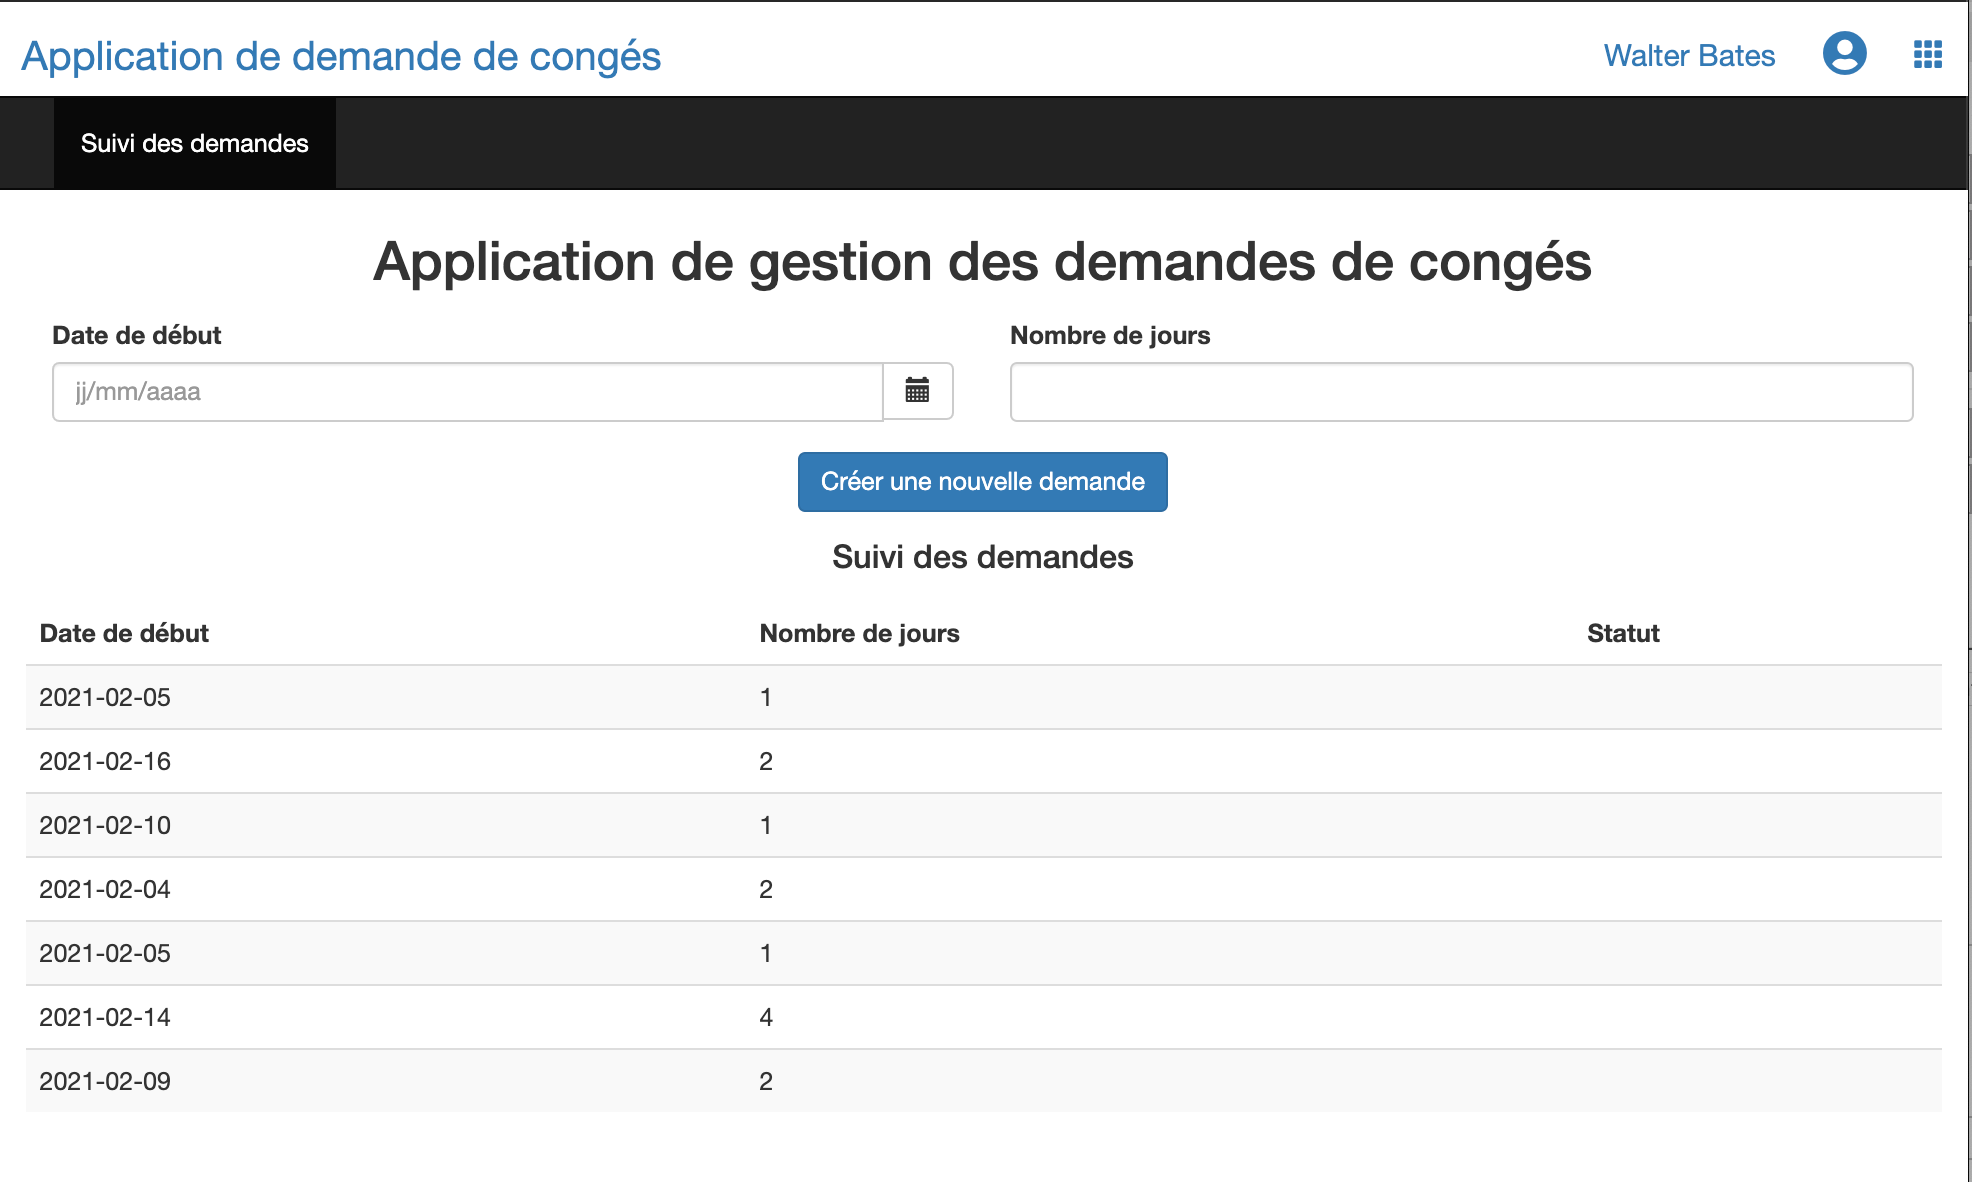
The application should look like this once deployed :
And that's it!
You want to go further? Follow the next iteration of the project. Next exercise: add a timer to the process